
阅读完需:约 4 分钟
关于多数据源的配置,前面有JdbcTemplate多数据源配置,那个比较简单,本文来说说MyBatis多数据源的配置。
其实关于多数据源,复杂的就直接上分布式数据库中间件,简单的再考虑多数据源。
工程创建
首先需要创建MyBatis项目,项目创建和前文的一样,添加MyBatis、MySQL以及Web依赖:
项目创建完成后,添加Druid依赖,和JdbcTemplate一样,这里添加Druid依赖也必须是专为Spring boot打造的Druid,不能使用传统的Druid。完整的依赖如下:
<dependency>
    <groupId>org.springframework.boot</groupId>
    <artifactId>spring-boot-starter-web</artifactId>
</dependency>
<dependency>
    <groupId>org.mybatis.spring.boot</groupId>
    <artifactId>mybatis-spring-boot-starter</artifactId>
    <version>2.0.0</version>
</dependency>
<dependency>
    <groupId>com.alibaba</groupId>
    <artifactId>druid-spring-boot-starter</artifactId>
    <version>1.1.10</version>
</dependency>
<dependency>
    <groupId>mysql</groupId>
    <artifactId>mysql-connector-java</artifactId>
    <version>5.1.28</version>
    <scope>runtime</scope>
</dependency>
多数据源配置
接下来配置多数据源,这里基本上还是和JdbcTemplate多数据源的配置方式一致,首先在application.properties中配置数据库基本信息,然后提供两个DataSource即可。
spring.datasource.one.type=com.alibaba.druid.pool.DruidDataSource
spring.datasource.one.username=root
spring.datasource.one.password=123
spring.datasource.one.url=jdbc:mysql://127.0.0.1:3306/lianxi

spring.datasource.two.type=com.alibaba.druid.pool.DruidDataSource
spring.datasource.two.username=root
spring.datasource.two.password=123
spring.datasource.two.url=jdbc:mysql://127.0.0.1:3306/lianxi2
然后再提供两个DataSource,如下:
@Configuration
public class config {
    @Bean
    @ConfigurationProperties(prefix = "spring.datasource.one")//加载前置为spring.datasource.one的配置
    DataSource dsOne(){
        return DruidDataSourceBuilder.create().build();
    }
    @Bean
    @ConfigurationProperties(prefix = "spring.datasource.two")
    DataSource dsTwo(){
        return DruidDataSourceBuilder.create().build();
    }
}
MyBatis配置
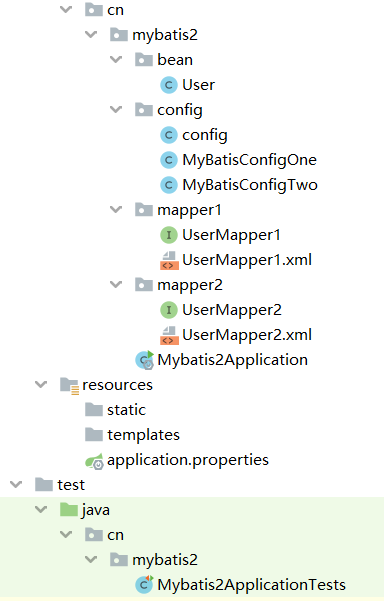
接下来则是MyBatis的配置,不同于JdbcTemplate,MyBatis的配置要稍微麻烦一些,因为要提供两个Bean,因此这里两个数据源我将在两个类中分开来配置,首先来看第一个数据源的配置:
@Configuration
@MapperScan(basePackages = "cn.mybatis2.mapper1",sqlSessionFactoryRef = "sqlSessionFactory1",sqlSessionTemplateRef ="sqlSessionTemplate1" )
public class MyBatisConfigOne {
    @Autowired
    @Qualifier("dsOne")
    DataSource dsOne;

    @Bean
    SqlSessionFactory sqlSessionFactory1() throws Exception {
        SqlSessionFactoryBean bean=new SqlSessionFactoryBean();
        bean.setDataSource(dsOne);
        return bean.getObject();
    }

    @Bean
    SqlSessionTemplate sqlSessionTemplate1() throws Exception {
        return new SqlSessionTemplate(sqlSessionFactory1());
    }
}
创建MyBatisConfigOne类,首先指明该类是一个配置类,配置类中要扫描的包是org.sang.mybatis.mapper1,即该包下的Mapper接口将操作dsOne中的数据,对应的SqlSessionFactory和SqlSessionTemplate分别是sqlSessionFactory1和sqlSessionTemplate1,在MyBatisConfigOne内部,分别提供SqlSessionFactory和SqlSessionTemplate即可,SqlSessionFactory根据dsOne创建,然后再根据创建好的SqlSessionFactory创建一个SqlSessionTemplate。
这里配置完成后,依据这个配置,再来配置第二个数据源即可:
@Configuration
@MapperScan(basePackages = "cn.mybatis2.mapper2",sqlSessionFactoryRef = "sqlSessionFactory2",sqlSessionTemplateRef ="sqlSessionTemplate2" )
public class MyBatisConfigTwo {
    @Autowired
    @Qualifier("dsTwo")
    DataSource dsTwo;

    @Bean
    SqlSessionFactory sqlSessionFactory2() throws Exception {
        SqlSessionFactoryBean bean=new SqlSessionFactoryBean();
        bean.setDataSource(dsTwo);
        return bean.getObject();
    }

    @Bean
    SqlSessionTemplate sqlSessionTemplate2() throws Exception {
        return new SqlSessionTemplate(sqlSessionFactory2());
    }
}
好了,这样MyBatis多数据源基本上就配置好了,接下来只需要在org.sang.mybatis.mapper1和org.sang.mybatis.mapper2包中提供不同的Mapper,Service中注入不同的Mapper就可以操作不同的数据源。
mapper创建
org.sang.mybatis.mapper1中的mapper:
public interface UserMapper1 {
    List<User> getAll1();
}
对应的xml:
<?xml version="1.0" encoding="UTF-8" ?>
<!DOCTYPE mapper
        PUBLIC "-//mybatis.org//DTD Mapper 3.0//EN"
        "http://mybatis.org/dtd/mybatis-3-mapper.dtd">
<mapper namespace="cn.mybatis2.mapper1.UserMapper1">

    <select id="getAll1" resultType="cn.mybatis2.bean.User">
        select * from user ;
    </select>

</mapper>
org.sang.mybatis.mapper2中的mapper:
public interface UserMapper2 {
    List<User> getAll2();
}
对应的xml:
<?xml version="1.0" encoding="UTF-8" ?>
<!DOCTYPE mapper
        PUBLIC "-//mybatis.org//DTD Mapper 3.0//EN"
        "http://mybatis.org/dtd/mybatis-3-mapper.dtd">
<mapper namespace="cn.mybatis2.mapper2.UserMapper2">

    <select id="getAll2" resultType="cn.mybatis2.bean.User">
        select * from user2 ;
    </select>

</mapper>
接下来,在Service中注入两个不同的Mapper,不同的Mapper将操作不同的数据源。
@SpringBootTest
class Mybatis2ApplicationTests {
    @Autowired
    UserMapper1 userMapper1;
    @Autowired
    UserMapper2 userMapper2;

    @Test
    void contextLoads() {
        List<User> all1 = userMapper1.getAll1();
        System.out.println(all1);
        List<User> all2 = userMapper2.getAll2();
        System.out.println(all2);
    }

}
结果:

更多配置:
