
阅读完需:约 23 分钟
不可否认的是,把Bean交给Spring管理,确实极其的方便,优点一大把,并且还几乎没有啥缺点。这也就是为何咱们一言不合就把Bean扔给Spring的原因。(在Spring的技术栈里这么做,完全没有问题)
然而,就Spring框架本身而言。它的强大的依赖注入,不仅仅能给自家的Bean使用,还能赋能给容器之外的Bean,快速的把需要注入的对象给它装配好。
在之前SpringSecurity框架中就有很多例子,比如下面的
本来我也一直以为你想用Spring的依赖注入功能,就得交给Spring容器进行管理。直到看到AutowireCapableBeanFactory源码的时候
关于AutowireCapableBeanFactory的继承关系和核心之前也有讲过
但是有些点还是要注意的
原对象可以不在Spring的IOC容器里,但是需要被依赖注入的成员,就必须是Spring容器管辖的Bean
我们使用的应用上下文ApplicationContext它就提供了
AutowireCapableBeanFactory getAutowireCapableBeanFactory() throws IllegalStateException;
虽然它不直接继承,但是它允许你拿这个工具去做你需要的事。
依赖版本
<parent>
    <groupId>org.springframework.boot</groupId>
    <artifactId>spring-boot-starter-parent</artifactId>
    <version>2.5.3</version>
    <relativePath/> <!-- lookup parent from repository -->
</parent>
AutowireCapableBeanFactory
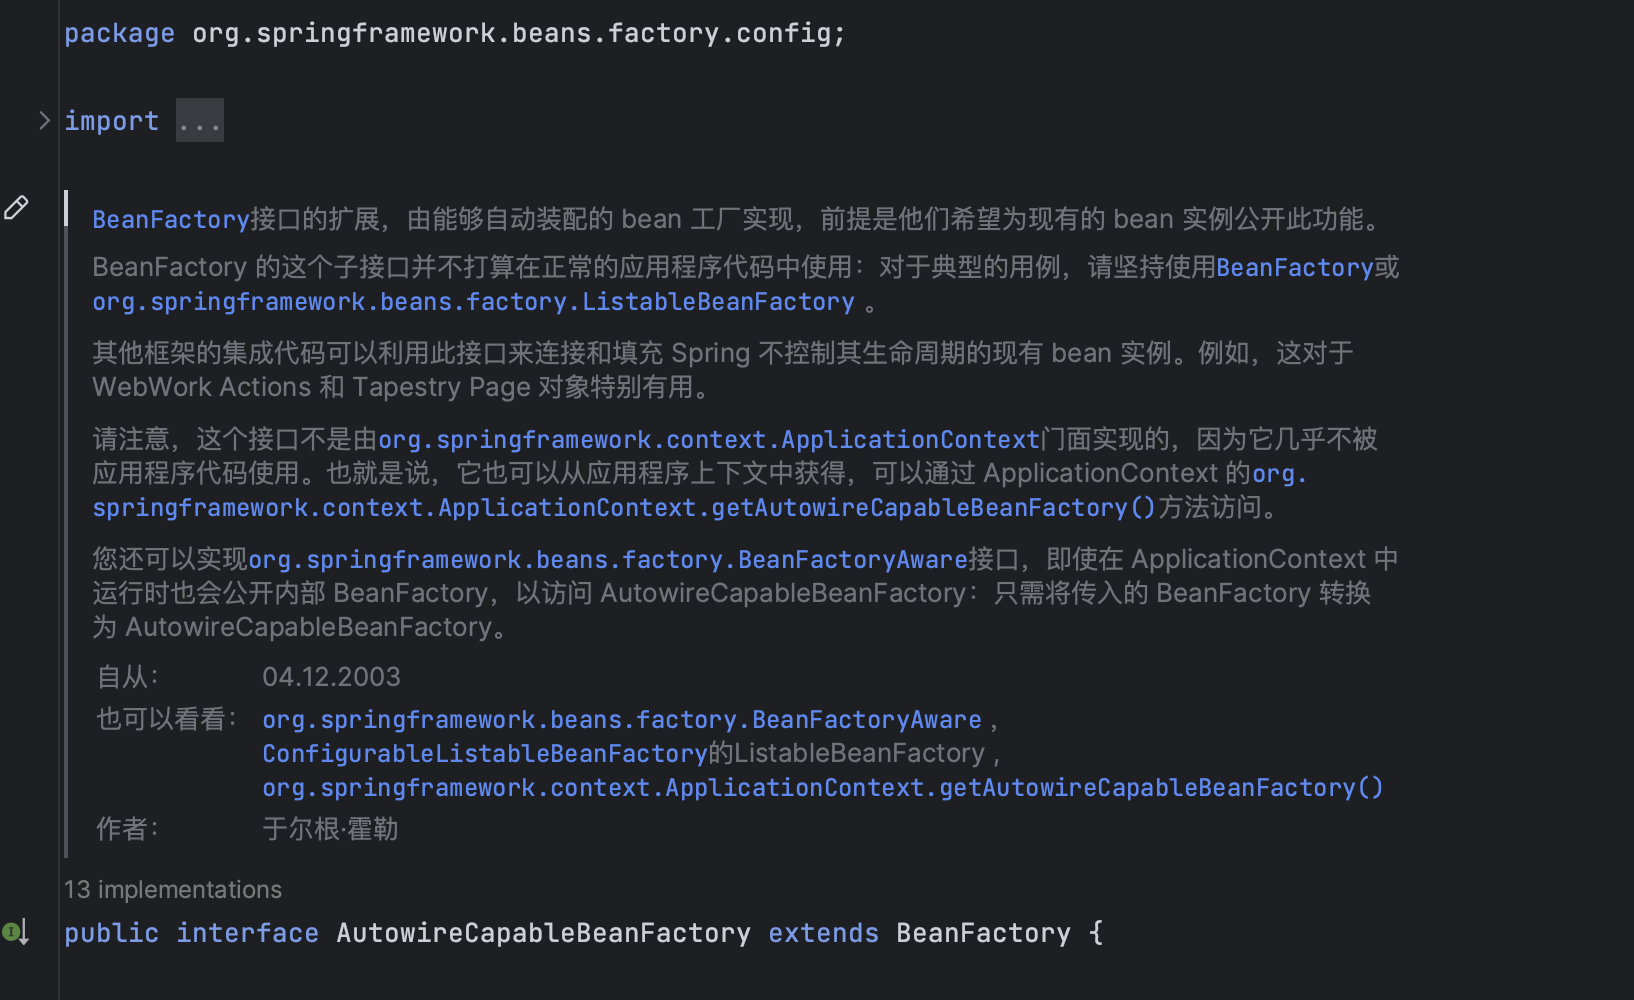
AutowireCapableBeanFactory在BeanFactory基础上实现了对存在实例的管理.可以使用这个接口集成其它框架,捆绑并填充并不由Spring管理生命周期并已存在的实例
public interface AutowireCapableBeanFactory extends BeanFactory {

	int AUTOWIRE_NO = 0;
	int AUTOWIRE_BY_NAME = 1;
	int AUTOWIRE_BY_TYPE = 2;
	int AUTOWIRE_CONSTRUCTOR = 3;
	@Deprecated
	int AUTOWIRE_AUTODETECT = 4;

	// 注意这个CreateBean和下面的CrateBean的不同
	//JavaDoc:It does <i>not</> imply traditional by-name or by-type autowiring of properties;
	// 也就是说它只管给你创建Bean,但是不管给你根据Name或者Type进行注入哦
	// 当然,你可以显示在对应属性上指定@Autowired注解,让他也可以达到相同的效果
	<T> T createBean(Class<T> beanClass) throws BeansException;
	void autowireBean(Object existingBean) throws BeansException;
	Object configureBean(Object existingBean, String beanName) throws BeansException;
	Object createBean(Class<?> beanClass, int autowireMode, boolean dependencyCheck) throws BeansException;
	Object autowire(Class<?> beanClass, int autowireMode, boolean dependencyCheck) throws BeansException;
	void autowireBeanProperties(Object existingBean, int autowireMode, boolean dependencyCheck)
			throws BeansException;
	void applyBeanPropertyValues(Object existingBean, String beanName) throws BeansException;
	Object initializeBean(Object existingBean, String beanName) throws BeansException;
	Object applyBeanPostProcessorsBeforeInitialization(Object existingBean, String beanName)
			throws BeansException;
	Object applyBeanPostProcessorsAfterInitialization(Object existingBean, String beanName)
			throws BeansException;
	void destroyBean(Object existingBean);
	<T> NamedBeanHolder<T> resolveNamedBean(Class<T> requiredType) throws BeansException;
	@Nullable
	Object resolveDependency(DependencyDescriptor descriptor, @Nullable String requestingBeanName) throws BeansException;
	@Nullable
	Object resolveDependency(DependencyDescriptor descriptor, @Nullable String requestingBeanName,
			@Nullable Set<String> autowiredBeanNames, @Nullable TypeConverter typeConverter) throws BeansException;

}
从案例入手分析
这里定义了一个实体类,需要Spring来创建并实例化它
/**
 * 测试AutowireCapableBeanFactory 所创建的实体类
 */
@Getter
@Setter
public class Child {

    // 注意:这里并没有@Autowired注解的
    private OrganizationMapper organizationMapper;

    private String name;
    private Integer age;

}
在测试环境中测试
/**
 * 测试AutowireCapableBeanFactory,手动注入Bean,不受Spring管理
 */
@Test
public void ApplicationContext(){
    // ApplicationContext applicationContext = new AnnotationConfigApplicationContext(AutowireCapableBean.class);
    // ApplicationContext里面是持久AutowireCapableBeanFactory这个工具的,它真实的实现类一般都是:DefaultListableBeanFactory
    ApplicationContext applicationContext = SpringUtil.getApplicationContext();
    AutowireCapableBeanFactory autowireCapableBeanFactory = applicationContext.getAutowireCapableBeanFactory();

    // 我们吧Child的创建过程都交给Bean工厂去帮我们处理,自己连new都不需要了 (createBean方法执行多次,就会创建多个child实例)
    Child child = (Child) autowireCapableBeanFactory.createBean(Child.class, AutowireCapableBeanFactory.AUTOWIRE_BY_TYPE, false);

    //简直残暴,没有@Autowired注解都给注入进来了~~~  至于为什么,看看下面的分析,你就知道了
    System.out.println(child.getOrganizationMapper()); //com.fsx.service.HelloServiceImpl@6a78afa0

    // 抛出异常 No qualifying bean of type 'com.fsx.bean.Child' available
    // 能佐证:我们的Bean并没交给Spring容器管理,它只是帮我们创建好了,并把对应属性注入进去了
    Child bean = applicationContext.getBean(Child.class);
    System.out.println(bean);
}这里的applicationContext我是直接从工具类里获取的,我们也可以通过其他方式来获取,比如通过ApplicationContextAware感知容器类来获取上下文。
运行代码我们能看到的结果
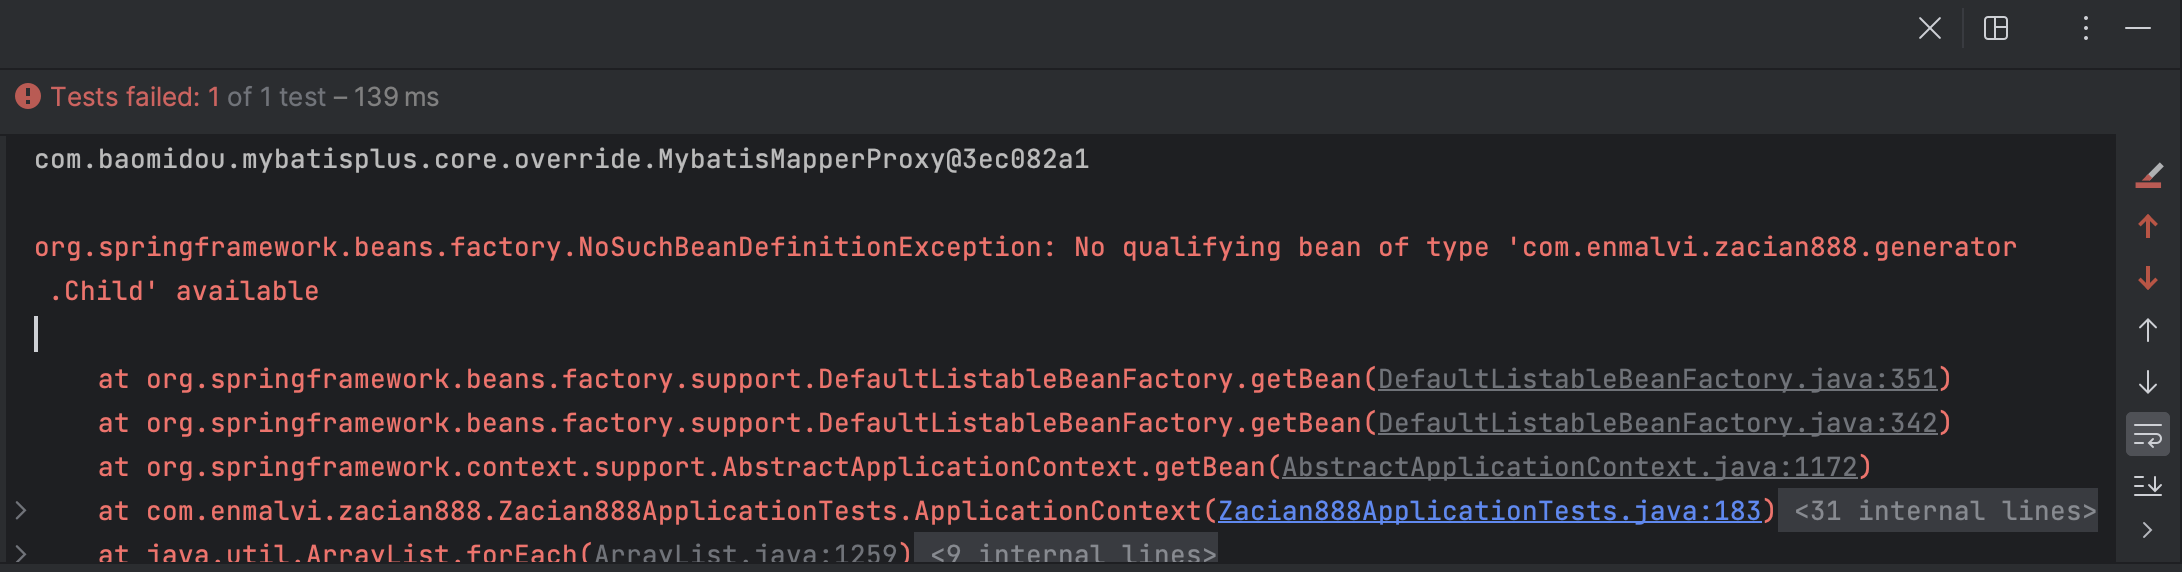
日志打印出了类的属性与名称可以调用这个类,但是在Spring的Bean里找不到这个类的Bean。
看到这个现象有没有很惊喜,我们哪怕不是Spring去管理的对象,都能够依赖注入进来容器内的对象,并且,并且连@Autowired注解都不需要。所以更别谈Spring内部的容器,并且还标注了注解的,那就应该更容易去实现了
createBean() 方法为例
AbstractAutowireCapableBeanFactory#createBean
	@Override
	public Object createBean(Class<?> beanClass, int autowireMode, boolean dependencyCheck) throws BeansException {
		// Use non-singleton bean definition, to avoid registering bean as dependent bean.
		RootBeanDefinition bd = new RootBeanDefinition(beanClass,  autowireMode, dependencyCheck);
		// 这里看到了,采用的不是单例,而是prototype
		bd.setScope(BeanDefinition.SCOPE_PROTOTYPE);
		// For the nullability warning, see the elaboration in AbstractBeanFactory.doGetBean;
		// in short: This is never going to be null unless user-declared code enforces null.
		// doc说得很明白,这里返回值永远不可能为null。除非调用者强制return null
		// 注意的是:这里BeanName就是beanClass.getName()
		return createBean(beanClass.getName(), bd, null);
	}

// 最终都调用到了下面这个createBean方法。它也是AbstractBeanFactory提供的一个抽象方法
// 最终也由AbstractAutowireCapableBeanFactory去实现的。 我们熟悉的doGetBean()方法,最终也是调用它来创建实例对象  只是doGetBean()把单例对象都缓存起来了
// 这个方法很单纯:创建一个实例,然后初始化他(给属性们赋值),然后return出去即可
	@Override
	protected Object createBean(String beanName, RootBeanDefinition mbd, @Nullable Object[] args)
			throws BeanCreationException {

		if (logger.isDebugEnabled()) {
			logger.debug("Creating instance of bean '" + beanName + "'");
		}
		RootBeanDefinition mbdToUse = mbd;

		// Make sure bean class is actually resolved at this point, and
		// clone the bean definition in case of a dynamically resolved Class
		// which cannot be stored in the shared merged bean definition.
		Class<?> resolvedClass = resolveBeanClass(mbd, beanName);
		if (resolvedClass != null && !mbd.hasBeanClass() && mbd.getBeanClassName() != null) {
			mbdToUse = new RootBeanDefinition(mbd);
			mbdToUse.setBeanClass(resolvedClass);
		}

		// Prepare method overrides.
		// 解析一些@lookup注解之类的  忽略
		try {
			mbdToUse.prepareMethodOverrides();
		}
		catch (BeanDefinitionValidationException ex) {
			throw new BeanDefinitionStoreException(mbdToUse.getResourceDescription(),
					beanName, "Validation of method overrides failed", ex);
		}

		try {
			// Give BeanPostProcessors a chance to return a proxy instead of the target bean instance.
			// 这个之前都解释过了,就不解释了。若BeanPostProcessors 产生了一个代理对象,就不需要我去创建了,就不继续往下走了(AOP都走这里)
			Object bean = resolveBeforeInstantiation(beanName, mbdToUse);
			if (bean != null) {
				return bean;
			}
		}
		catch (Throwable ex) {
			throw new BeanCreationException(mbdToUse.getResourceDescription(), beanName,
					"BeanPostProcessor before instantiation of bean failed", ex);
		}

		try {
			// 重点来了。它是本类的一个protected方法,专门用于处理创建Bean的过程(包括属性赋值之类的)
			Object beanInstance = doCreateBean(beanName, mbdToUse, args);
			if (logger.isDebugEnabled()) {
				logger.debug("Finished creating instance of bean '" + beanName + "'");
			}
			return beanInstance;
		}
		catch (BeanCreationException | ImplicitlyAppearedSingletonException ex) {
			// A previously detected exception with proper bean creation context already,
			// or illegal singleton state to be communicated up to DefaultSingletonBeanRegistry.
			throw ex;
		}
		catch (Throwable ex) {
			throw new BeanCreationException(
					mbdToUse.getResourceDescription(), beanName, "Unexpected exception during bean creation", ex);
		}
	}
doCreateBean
这里再看看doCreateBean吧
	protected Object doCreateBean(final String beanName, final RootBeanDefinition mbd, final @Nullable Object[] args){
	BeanWrapper instanceWrapper = null;
	...
	//createBeanInstance 是重点(都是返回一个BeanWrapper)  它也是本类的一个protected方法
	instanceWrapper = createBeanInstance(beanName, mbd, args);

	// Bean已经实例化好了,准备初始化吧
	...
	// 执行MergedBeanDefinitionPostProcessor
	// 处理循环引用,现在若我们Bean不在容器里,肯定是不存在循环引用的(但是我依赖的Bean可能还没创建是真的,也是这里来处理的)
	...

	// 给Bean实例的各个属性进行赋值 比如调用InstantiationAwareBeanPostProcessor#postProcessAfterInstantiation、给属性注入值(并不依赖于@Autowired注解)
	// 执行InstantiationAwareBeanPostProcessor#postProcessPropertyValues等等
	populateBean(beanName, mbd, instanceWrapper);

	// 初始化Bean 执行一些初始化方法init @PostContruct方法等等
	//BeanPostProcessor的postProcessBeforeInitialization和postProcessAfterInitialization等等
	exposedObject = initializeBean(beanName, exposedObject, mbd);

}
综上可以看出,目前最重要的三个步骤为doCreateBean里面的:createBeanInstance、populateBean、initializeBean,都在AbstractAutowireCapableBeanFactory这里
createBeanInstance
	protected BeanWrapper createBeanInstance(String beanName, RootBeanDefinition mbd, @Nullable Object[] args) {
		// Make sure bean class is actually resolved at this point.
		Class<?> beanClass = resolveBeanClass(mbd, beanName);

		// 如果不为null,并且还不是public的访问权限 并且还nonPublicAccessAllowed为false 那就抛异常吧
		// 题外话:nonPublicAccessAllowed为true的情况下(默认值),即使你不是public的也ok
		if (beanClass != null && !Modifier.isPublic(beanClass.getModifiers()) && !mbd.isNonPublicAccessAllowed()) {
			throw new BeanCreationException(mbd.getResourceDescription(), beanName,
					"Bean class isn't public, and non-public access not allowed: " + beanClass.getName());
		}

		// 你可以自己通过Supplier来创建Bean,最终交给obtainFromSupplier包装成BeanWrapper
		Supplier<?> instanceSupplier = mbd.getInstanceSupplier();
		if (instanceSupplier != null) {
			return obtainFromSupplier(instanceSupplier, beanName);
		}

		//通过工厂方法创建 支持工厂方法方式创建Bean
		if (mbd.getFactoryMethodName() != null)  {
			return instantiateUsingFactoryMethod(beanName, mbd, args);
		}

		// Shortcut when re-creating the same bean...
		//一个类可能有多个构造器,所以Spring得根据参数个数、类型确定需要调用的构造器
		//在使用构造器创建实例后,Spring会将解析过后确定下来的构造器或工厂方法保存在缓存中,避免再次创建相同bean时再次解析
		boolean resolved = false;
		boolean autowireNecessary = false;
		if (args == null) {
			synchronized (mbd.constructorArgumentLock) {
				if (mbd.resolvedConstructorOrFactoryMethod != null) {
					resolved = true;
					autowireNecessary = mbd.constructorArgumentsResolved;
				}
			}
		}

		// 首次进入,resolved为false。
		// 说一下:ConstructorResolver,就是找到合适的构造器给你去实例化一个Bean(会结合Spring容器进行一起解析)
		if (resolved) {
			if (autowireNecessary) {
				return autowireConstructor(beanName, mbd, null, null);
			}
			else {
				return instantiateBean(beanName, mbd);
			}
		}

		// Need to determine the constructor...
		// 执行BeanPostProcesso#determineCandidateConstructors 自己去决定使用哪个构造器,可能会返回一批构造器哟
		// 这里我们很熟悉的`AutowiredAnnotationBeanPostProcessor`就实现了这个方法,可以智能去找出一个合适的构造器.
		// 这里需要注意了,因为我们的Child的属性HelloService里并没有书写@Autowired属性,所以这里最终的返回结果是null================这个需要注意Spring的处理(空构造就不用交给autowireConstructor处理了,自己直接new吧)
		// 需要注意的是:若我们自己写了一个构造    public Child(HelloService helloService) {  this.helloService = helloService; } 那么它就会拿到,然后走下面让Spring执行构造器的注入的
		// 旁白:如果你只有空构造,那就直接instantiateBean,否则会自动去走Spring的构造器注入的逻辑
		Constructor<?>[] ctors = determineConstructorsFromBeanPostProcessors(beanClass, beanName);
		if (ctors != null ||
				mbd.getResolvedAutowireMode() == RootBeanDefinition.AUTOWIRE_CONSTRUCTOR ||
				mbd.hasConstructorArgumentValues() || !ObjectUtils.isEmpty(args))  {
			return autowireConstructor(beanName, mbd, ctors, args);
		}

		// No special handling: simply use no-arg constructor.
		// 所以我们当前的Child,只有空构造器,所以就只能走这里啦
		// 这个方法的逻辑比较简单,我就不贴了。主要是用InstantiationStrategy策略器进行实例化,至于它是什么东东?文末的时候我会解释的
		return instantiateBean(beanName, mbd);
	}
该方法执行完成之后,我们对象就被创建了,但仅仅还只是创建好哦。下面继续看:
populateBean
populateBean: populate:居住于; 生活于; 大致意思就是给Bean的各个属性赋值
	protected void populateBean(String beanName, RootBeanDefinition mbd, @Nullable BeanWrapper bw) {
		if (bw == null) {
			if (mbd.hasPropertyValues()) {
				throw new BeanCreationException(
						mbd.getResourceDescription(), beanName, "Cannot apply property values to null instance");
			}
			else {
				// Skip property population phase for null instance.
				return;
			}
		}

		// Give any InstantiationAwareBeanPostProcessors the opportunity to modify the
		// state of the bean before properties are set. This can be used, for example,
		// to support styles of field injection.
		boolean continueWithPropertyPopulation = true;

		// 因为已经实例化了,对象已经创建了,所以这里立马执行了InstantiationAwareBeanPostProcessor#postProcessAfterInstantiation方法
		// 单反只有其中一个返回了false,相当于告诉容器我都处理好了,那么后面的赋值操作就Spring容器就不再处理了
		if (!mbd.isSynthetic() && hasInstantiationAwareBeanPostProcessors()) {
			for (BeanPostProcessor bp : getBeanPostProcessors()) {
				if (bp instanceof InstantiationAwareBeanPostProcessor) {
					InstantiationAwareBeanPostProcessor ibp = (InstantiationAwareBeanPostProcessor) bp;
					if (!ibp.postProcessAfterInstantiation(bw.getWrappedInstance(), beanName)) {
						continueWithPropertyPopulation = false;
						break;
					}
				}
			}
		}

		if (!continueWithPropertyPopulation) {
			return;
		}

		//以对象的方式存储健值对,比存储在map会更加灵活
		//PropertyValues  是用来管理PropertyValue的  一般情况下为null
		PropertyValues pvs = (mbd.hasPropertyValues() ? mbd.getPropertyValues() : null);

		// 那么接下来,就开始干正事了~~~~
		// 这里需要注意的是:我们知道上面我们自己传进来的是byType,所以这个的if是能够进来的,最终能够定位autowireByType让它去实现注入功能。
		//所以我们的helloService字段要不要@Autowired要不要无所谓(要了也只是重复操作而已,但是我建议显示的指明吧)

		//但是被Spring扫描Scan管理的Bean们(或者其余Bean),如果你想要给他字段注入属性值,必须必须使用@Autowired注解,从而交给后置处理器AutowiredAnnotationBeanPostProcessor#postProcessPropertyValues这个方法去处理
		if (mbd.getResolvedAutowireMode() == RootBeanDefinition.AUTOWIRE_BY_NAME ||
				mbd.getResolvedAutowireMode() == RootBeanDefinition.AUTOWIRE_BY_TYPE) {
			MutablePropertyValues newPvs = new MutablePropertyValues(pvs);

			// Add property values based on autowire by name if applicable.
			if (mbd.getResolvedAutowireMode() == RootBeanDefinition.AUTOWIRE_BY_NAME) {
				autowireByName(beanName, mbd, bw, newPvs);
			}

			// Add property values based on autowire by type if applicable.
			// 按类型自动装配。一般都会走这里,通过类型的匹配,来给属性赋值,实现注入
			if (mbd.getResolvedAutowireMode() == RootBeanDefinition.AUTOWIRE_BY_TYPE) {

				// 它的步骤相对简单:显示BeanUtils.getWriteMethodParameter(pd)拿到set方法(所以,这里需要注意,若没有set方法,这里是注入不进去的,这个没@Autowired强大)
				// 然后去解析去容器里面找对应的依赖,也是resolveDependency方法(最终由DefaultListableBeanFactory去实现的)


				// 这里需要注意:注入的时候isSimpleProperty不会被注入的(包括基本数据类型、Integer、Long。。。
				//甚至还包括Enum、CharSequence(显然就包含了Spring)、Number、Date、URI、URL、Locale、Class等等)
				// 但是,但是,但是标注@Autowired是能够注入的哦,哪怕是String、Integer等等
				// 标注了@Autowired,没有找到反倒为报错 No qualifying bean of type 'java.lang.String' 。。。注意这些区别
				autowireByType(beanName, mbd, bw, newPvs);
			}

			pvs = newPvs;
		}

		boolean hasInstAwareBpps = hasInstantiationAwareBeanPostProcessors();
		boolean needsDepCheck = (mbd.getDependencyCheck() != RootBeanDefinition.DEPENDENCY_CHECK_NONE);

		if (hasInstAwareBpps || needsDepCheck) {
			if (pvs == null) {
				pvs = mbd.getPropertyValues();
			}
			PropertyDescriptor[] filteredPds = filterPropertyDescriptorsForDependencyCheck(bw, mbd.allowCaching);
			if (hasInstAwareBpps) {

				// 开始执行InstantiationAwareBeanPostProcessor#postProcessPropertyValues
				// 这里主要施工的又是我们大名鼎鼎的AutowiredAnnotationBeanPostProcessor它了,他会根据所有标注有@Autpwired注解地方,执行注入(非常重要)
				for (BeanPostProcessor bp : getBeanPostProcessors()) {
					if (bp instanceof InstantiationAwareBeanPostProcessor) {
						InstantiationAwareBeanPostProcessor ibp = (InstantiationAwareBeanPostProcessor) bp;
						pvs = ibp.postProcessPropertyValues(pvs, filteredPds, bw.getWrappedInstance(), beanName);
						if (pvs == null) {
							return;
						}
					}
				}
			}
			if (needsDepCheck) {
				checkDependencies(beanName, mbd, filteredPds, pvs);
			}
		}

		//applyPropertyValues和PropertyValues密切相关,在后面相关专题在详细讲解  会回到这里的,持续关注~
		// 作用:Apply the given property values, resolving any runtime references
		if (pvs != null) {
			applyPropertyValues(beanName, mbd, bw, pvs);
		}
	}
至此,一个Bean的实例化、初始化操作可以完成了一大部分了(各字段、属性的赋值也都已经ok了嘛~),那么还剩下一些收尾工作:比如init方法、post-construct方法之类的,就交给initializeBean: 初始化Bean(调用一些初始化方法)
-
invokeAwareMethods:执行一些感知接口Aware的注入 -
postProcessBeforeInitialization:在 Bean 对象执行初始化方法之前,执行此方法。基本上也是执行一些Aware的注入。-
InitDestroyAnnotationBeanPostProcessor在这里会执行@PostConstruct标记的方法 -
ApplicationContextAwareProcessor/ServletContextAwareProcessor会实现感知接口的注入
-
-
invokeInitMethods:先执行InitializingBean#afterPropertiesSet方法,再执行init-method。 -
postProcessAfterInitialization:在 Bean 对象执行初始化方法之后,执行此方法这里面有不少干实事的:-
AbstractAdvisingBeanPostProcessor,AbstractAutoProxyCreator:会把所有的切面保存下来(AOP包下的) -
ApplicationListenerDetector:会把所有的ApplicationListener子类保存起来 -
ScheduledAnnotationBeanPostProcessor:会把所有的标注了@Scheduled的方法保存起来 -
SimpleServletPostProcessor:会调用Servlet#init的init方法
-
至于对应的@EventListener注解是什么时候解析的。
是它:EventListenerMethodProcessor,它是一个SmartInitializingSingleton,所以它是在preInstantiateSingletons()方法的最后一步去调用的(比getBean()方法还晚)
由此,我们是可以得出结论的:Spring之外的Bean,SmartInitializingSingleton接口对他是不起作用的。但是,其余的处理器、注解等等都是有用的哦:@PostConstruct、@Autowired等等注解
完成结束了我们的Bean的创建、实例化、初始化等等操作。
其它API
autowireBean
	@Override
	public Object autowire(Class<?> beanClass, int autowireMode, boolean dependencyCheck) throws BeansException {
		// Use non-singleton bean definition, to avoid registering bean as dependent bean.
		final RootBeanDefinition bd = new RootBeanDefinition(beanClass, autowireMode, dependencyCheck);
		bd.setScope(BeanDefinition.SCOPE_PROTOTYPE);
		if (bd.getResolvedAutowireMode() == AUTOWIRE_CONSTRUCTOR) {
			return autowireConstructor(beanClass.getName(), bd, null, null).getWrappedInstance();
		}
		else {
			Object bean;
			final BeanFactory parent = this;
			if (System.getSecurityManager() != null) {
				bean = AccessController.doPrivileged((PrivilegedAction<Object>) () ->
						getInstantiationStrategy().instantiate(bd, null, parent),
						getAccessControlContext());
			}
			else {
				bean = getInstantiationStrategy().instantiate(bd, null, parent);
			}
			populateBean(beanClass.getName(), bd, new BeanWrapperImpl(bean));
			return bean;
		}
	}
和createBean的区别:createBean是全量的。什么各种后置处理器都不执行。而autowire它直接调用策略器实例化了,什么有关实例化的处理器就都不会执行了(所以不能生成代理对象了嘛)(使用较少,但可以绕过一些处理器)
autowireBeanProperties
autowireBeanProperties: 相当于只执行了给属性赋值populateBean()(以及相关的处理器)
	@Override
	public void autowireBeanProperties(Object existingBean, int autowireMode, boolean dependencyCheck)
			throws BeansException {

		// 构造器注入的模式,这里就不能支持了
		if (autowireMode == AUTOWIRE_CONSTRUCTOR) {
			throw new IllegalArgumentException("AUTOWIRE_CONSTRUCTOR not supported for existing bean instance");
		}
		// Use non-singleton bean definition, to avoid registering bean as dependent bean.
		RootBeanDefinition bd =
				new RootBeanDefinition(ClassUtils.getUserClass(existingBean), autowireMode, dependencyCheck);
		bd.setScope(BeanDefinition.SCOPE_PROTOTYPE);
		BeanWrapper bw = new BeanWrapperImpl(existingBean);
		initBeanWrapper(bw);
		populateBean(bd.getBeanClass().getName(), bd, bw);
	}
    public static void main(String[] args) {
        ApplicationContext applicationContext = new AnnotationConfigApplicationContext(RootConfig.class);
        // ApplicationContext里面是持久AutowireCapableBeanFactory这个工具的,它真实的实现类一般都是:DefaultListableBeanFactory
        AutowireCapableBeanFactory autowireCapableBeanFactory = applicationContext.getAutowireCapableBeanFactory();

        //我们也可以自己手动创建一个实例  然后让Spring帮我们自动装配就行  也能正常注入
        Child child = new Child();
        autowireCapableBeanFactory.autowireBeanProperties(child, AutowireCapableBeanFactory.AUTOWIRE_BY_TYPE, false);
        System.out.println(child.getHelloService()); //com.fsx.service.HelloServiceImpl@175c2241
    }
	@Override
	public Object initializeBean(Object existingBean, String beanName) {
		return initializeBean(beanName, existingBean, null);
	}
initializeBean:相当于只执行了初始化Bean的一些操作
AutowireCapableBeanFactory的使用场景
- 1、首先最大的使用场景就是Spring内部
- 2、Spring Boot集成Quartz的时候。很好的使用到了此方案。我们在Job类里面使用@Autowired注入的时候,若出现注入不进去的现象。可以考虑使用
AutowireCapableBeanFactory进行协助 - 3、前面说到的继承特定的第三方框架,他们的Bean并不需要交给Spring管理,但是又想用到Spring容器里面的Bean完成一些功能的时候,使用它就特别的方便了。
InstantiationStrategy
Bean大都最终的实例化操作是交由这个策略器来搞定的
// Interface responsible for creating instances corresponding to a root bean definition.
// 简而言之,就是根据RootBeanDefinition,去实例化一个实例(相当于new了一个对象而已,bean的具体的属性在此时并未赋值)
public interface InstantiationStrategy {

	// 下面是他的三个重载方法
	// owner:这个Bean定义所属的BeanFactory工厂
	// args:构造函数的参数(大多数情况下都用无参构造)
	// factoryBean:factoryMethod  也支持工厂方法方式创建实例(注意此factoryBean非我们所常指的接口:FactoryBean哦~)
	Object instantiate(RootBeanDefinition bd, @Nullable String beanName, BeanFactory owner)
			throws BeansException;
	Object instantiate(RootBeanDefinition bd, @Nullable String beanName, BeanFactory owner,
			Constructor<?> ctor, @Nullable Object... args) throws BeansException;
	Object instantiate(RootBeanDefinition bd, @Nullable String beanName, BeanFactory owner,
			@Nullable Object factoryBean, Method factoryMethod, @Nullable Object... args)
			throws BeansException;

}
SimpleInstantiationStrategy
简单实现类,采用实现部分,抽象部分的策略(但是它可不是抽象类,因为我们是可以直接使用它的(如果没有方法注入MethodInjection的去求的话)。只是我们一般都不会直接使用它,而是子类
它的源码逻辑比较简单,伪代码如下:
if (!bd.hasMethodOverrides()) {
    ...
    // 最后:借助BeanUtils.instantiateClass(ctor, args) 利用构造函数创建实例
} else {
    return instantiateWithMethodInjection(bd, beanName, owner, ctor, args);
}
CglibSubclassingInstantiationStrategy
留下了包含MethodOverride对象的bd对象定义未做实现,那么CglibSubclassingInstantiationStrategy就是它的一个实现:它采用采用cglib生成类方式,实例化对象。(当然若不需要生成代理对象,就直接使用父类的功能即可的)
它的源码相对来说比较复杂:主要是静态内部类CglibSubclassCreator它生成一个子类对象去实现方法注入的功能,它内部有cglib动态代理的内容
这里在之前的IOC容器构建上有核心的构建方式
方法注入
当我们在一个bean中依赖其他的bean时,我们可以注入其他依赖的bean通过set()或者构造器方法。 这样调用get方法的时候返回在bean中注入的实例。但是如果我们希望在每次调用get方法的时候返回新的实例,怎么办呢?
比如单例的A,希望每次使用B的时候都是一个新的对象~
@Component
public class A {

    @Autowired
    private B b;

    public B getB() {
        return b;
    }
}

@Component
@Scope(ConfigurableBeanFactory.SCOPE_PROTOTYPE) // 这里scope指定不是单例
public class B {

}


    public static void main(String[] args) {
        ApplicationContext applicationContext = new AnnotationConfigApplicationContext(RootConfig.class);

        A a = applicationContext.getBean(A.class);

        // 我们发现,虽然我们给B设置成`prototype`,但是从a里面get出来的每次都还是同一个对象
        System.out.println(a.getB() == a.getB()); //true

        //证明B不是单例了:
        B b1 = applicationContext.getBean(B.class);
        B b2 = applicationContext.getBean(B.class);
        //证明B并不是单例的
        System.out.println(b1 == b2); //false
    }
这个没达到我们的需求嘛。因为每次A类里面使用B的时候,还是同一个实例~
原因:因为A是单例,它只会被实例化一次,因此对应的属性也会被注入一次。所以即使你get()调用了多次,返回的还是第一次赋值的那个属性值
解决方案
- 在bean A中引入
ApplicationContext每次调用方法时用上下文的getBean(name,class)方法去重新获取bean B的实例。 - 使用
@Lookup注解。
在A的get方法上加上@Lookup注解
@Component
public class A {

    @Autowired
    private B b;

    @Lookup // 采用方法注入
    public B getB() {
        return b;
    }
}

    public static void main(String[] args) {
        ApplicationContext applicationContext = new AnnotationConfigApplicationContext(RootConfig.class);

        A a = applicationContext.getBean(A.class);

        // 不仅仅每次getB都不一样了,我们还发现a已经变成了一个CGLIB的代理对象
        System.out.println(a); //com.fsx.bean.A$$EnhancerBySpringCGLIB$$558725dc@6a6cb05c
        System.out.println(a.getB() == a.getB()); //false
    }
一下子就解决问题了。在上面分析的时候我们看到AbstractAutowireCapableBeanFactory默认采用的创建Bean策略器为:
private InstantiationStrategy instantiationStrategy = new CglibSubclassingInstantiationStrategy();
因此默认就是支持方法注入的,所以当我们方法标注了@Lookup注解,就能达到我们上诉的效果了
总结
AutowireCapableBeanFactory接口给我们最大的感觉就是:交给Spring管理的Bean,关于Bean的创建、实例化、初始化等都是自动挡。而我们使用此接口可以拆解成手动档,自己来控制Bean的一些行为。
