
阅读完需:约 2 分钟
在springboot里aop和spring里的用法是一样的只不过是没了xml配置改用注解来编写,aop的作用很大可以用来测试程序,增加新的功能等。
实践:
在IDEA里有时候无法自动加载AOP的依赖我们可以来手动加载它:
<dependency>
<groupId>org.springframework.boot</groupId>
<artifactId>spring-boot-starter-aop</artifactId>
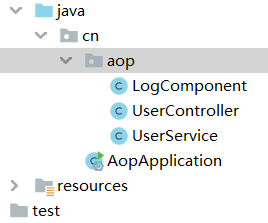
</dependency>加载完依赖后创建 UserService 文件
@Service
public class UserService {
    public String getUsernameById(Integer id){
        System.out.println("id");
        return "hello";
    }

    public void deleteUsernameById(Integer id){
        System.out.println("id22222");
    }
}
我们可以先不用连接数据库,毕竟这个是用来测试的重点是AOP而不是数据库!
接着创建UserController文件
@RestController
public class UserController {
    @Autowired
    UserService userService;

    @GetMapping("/test1")
    public String getUsernameById(Integer id){
       return userService.getUsernameById(id);
    }

    @GetMapping("/test2")
    public void deleteUsernameById(Integer id){
        userService.deleteUsernameById(id);
    }

}
最后是重头戏 LogComponent 文件:
@Component
@Aspect
public class LogComponent {
    @Pointcut("execution(* cn.aop.*.*(..))") //在cn.aop包下的任意方法任意参数
    public void pcl(){
    }

    @Before(value="pcl()")
    public void before(JoinPoint joinPoint){
        String name = joinPoint.getSignature().getName();
        System.out.println("前置通知"+name);
    }

    @After(value = "pcl()")
    public void after(JoinPoint joinPoint){
        String name = joinPoint.getSignature().getName();
        System.out.println("后置通知"+name);
    }

    @AfterReturning(value = "pcl()",returning = "result")
    public void afterreturning(JoinPoint joinPoint,Object result){
        String name = joinPoint.getSignature().getName();
        System.out.println("返回通知"+name+result);
    }

    @AfterThrowing(value = "pcl()",throwing = "e")
    public  void afterthrowing(JoinPoint joinPoint,Exception e){
        String name = joinPoint.getSignature().getName();
        System.out.println("异常通知"+name+e.getMessage());
    }

    @Around(value = "pcl()") //环绕通知
    public Object around(ProceedingJoinPoint proceedingJoinPoint) throws Throwable {
        try {
            //前置通知
            proceedingJoinPoint.proceed();
            //后置通知
        }catch (Exception e){
            //异常通知
        }finally {
            //最终通知
        }

        return "环绕通知";
    }

}
在游览器中输入测试的地址:http://localhost:8080/test1

