
阅读完需:约 45 分钟
Java语言的输入输出功能是十分强大而灵活的。
在Java类库中,IO部分的内容是很庞大的,因为它涉及的领域很广泛:标准输入输出,文件的操作,网络上的数据流,字符串流,对象流,zip文件流。
InputStream、OutputStream(字节流)
  //读取文件(字节流)
        InputStream in = new FileInputStream("d:\\1.txt");
        //写入相应的文件
        OutputStream out = new FileOutputStream("d:\\2.txt");
        //读取数据
        //一次性取多少字节
        byte[] bytes = new byte[2048];
        //接受读取的内容(n就代表的相关数据,只不过是数字的形式)
        int n = -1;
        //循环取出数据
        while ((n = in.read(bytes,0,bytes.length)) != -1) {
            //转换成字符串
            String str = new String(bytes,0,n,"GBK"); #这里可以实现字节到字符串的转换,比较实用
            System.out.println(str);
            //写入相关文件
            out.write(bytes, 0, n);
        }
        //关闭流
        in.close();
        out.close();
BufferedInputStream、BufferedOutputStream(缓存字节流)使用方式和字节流差不多,但是效率更高(推荐使用)
//读取文件(缓存字节流)
        BufferedInputStream in = new BufferedInputStream(new FileInputStream("d:\\1.txt"));
        //写入相应的文件
        BufferedOutputStream out = new BufferedOutputStream(new FileOutputStream("d:\\2.txt"));
        //读取数据
        //一次性取多少字节
        byte[] bytes = new byte[2048];
        //接受读取的内容(n就代表的相关数据,只不过是数字的形式)
        int n = -1;
        //循环取出数据
        while ((n = in.read(bytes,0,bytes.length)) != -1) {
            //转换成字符串
            String str = new String(bytes,0,n,"GBK");
            System.out.println(str);
            //写入相关文件
            out.write(bytes, 0, n);
        }
        //清楚缓存
        out.flush();
        //关闭流
        in.close();
        out.close();
BufferedOutputStream和ByteArrayOutputStream区别
BufferedOutputStream是一个缓冲数据输出流接口, ByteArrayOutputStream则是字节数组输出流接口. 这2个输出流都是我们经常用到的, 它们都是OutputStream的子类
BufferedOutputStream
BufferedOutputStream会首先创建一个默认的容器量, capacity = 8192 = 8KB, 每次在写的时候都会去比对capacity是否还够用, 如果不够用的时候, 就flushBuffer(), 把buf中的数据写入对应的outputStream中, 然后将buf清空, 一直这样等到把内容写完. 在这过程中主要起到了一个数据缓冲的功能.
public synchronized void write(byte b[], int off, int len) throws IOException {
      // 在这判断需要写的数据长度是否已经超出容器的长度了,如果超出则直接写到相应的outputStream中,并清空缓冲区
      if (len >= buf.length) {
          flushBuffer();
          out.write(b, off, len);
          return;
      }
      // 判断缓冲区剩余的容量是否还够写入当前len的内容,如果不够则清空缓冲区
      if (len > buf.length - count) {
          flushBuffer();
      }
      // 将要写的数据先放入内存中,等待数据达到了缓冲区的长度后,再写到相应的outputStream中
      System.arraycopy(b, off, buf, count, len);
      count += len;
    }
flushBuffer ()
private void flushBuffer() throws IOException {
       if (count > 0) {
          // 把写入内存中的数据写到构造方法里传入的OutputStream句柄里, 并把容量大小清楚
    out.write(buf, 0, count);
    count = 0;
       }
   }
这个类最重要的就是这2个方法, 这样节省了大量的内存空间, 合理的分配内存来完成数据输出
ByteArrayOutputStream
普通的OutputStream, 例如ByteArrayOutputStream也会首先创建一个默认的容器量, capacity = 32 = 32b, 每次在写的时候都会去比对capacity是否还够用, 如果不够用的时候, 就重新创建buf的容量, 一直等到内容写完, 这些数据都会一直处于内存中.
public synchronized void write(byte b[], int off, int len) {
      if ((off < 0) || (off > b.length) || (len < 0) ||
            ((off + len) > b.length) || ((off + len) < 0)) {
          throw new IndexOutOfBoundsException();
      } else if (len == 0) {
          return;
      }
        // 不断对自己的容量进行相加
        int newcount = count + len;
        // 如果新的容量大小已经超过了现有的大小时,则重新开辟新的内存区域来保存当前的数据
        if (newcount > buf.length) {
            buf = Arrays.copyOf(buf, Math.max(buf.length << 1, newcount));
        }
        System.arraycopy(b, off, buf, count, len);
        count = newcount;
    }
总结 :
当你资源不足够用时,选择BufferedOutputStream是最佳的选择, 当你选择快速完成一个作业时,可以选择ByteArrayOutputStream之类的输出流
ByteArrayOutputStream是将数据全部缓存到自身,然后一次性输出;而BufferedOutputStream是缓存一部分后,一次一次的输出。
另外,使用ByteArrayOutputStream、ByteArrayInputStream另一个好处是:当使用完他们缓存的字节流以后或者关闭它们之后,其中的字节流依然存在,可在此利用。
InputStreamReader、OutputStreamWriter(字节流,这种方式不建议使用,不能直接字节长度读写)。使用范围用做字符转换
  //读取文件(字节流)
        InputStreamReader in = new InputStreamReader(new FileInputStream("d:\\1.txt"),"GBK");
        //写入相应的文件
        OutputStreamWriter out = new OutputStreamWriter(new FileOutputStream("d:\\2.txt"));
        //读取数据
        //循环取出数据
        byte[] bytes = new byte[1024];
        int len = -1;
        while ((len = in.read()) != -1) {
            System.out.println(len);
            //写入相关文件
            out.write(len);
        }
        //清楚缓存
        out.flush();
        //关闭流
        in.close();
        out.close();
BufferedReader、BufferedWriter(缓存流,提供readLine方法读取一行文本)
 //读取文件(字符流)
        BufferedReader in = new BufferedReader(new InputStreamReader(new FileInputStream("d:\\1.txt"),"GBK"));#这里主要是涉及中文
        //BufferedReader in = new BufferedReader(new FileReader("d:\\1.txt")));
        //写入相应的文件
        BufferedWriter out = new BufferedWriter(new OutputStreamWriter(new FileOutputStream("d:\\2.txt"),"GBK"));
        //BufferedWriter out = new BufferedWriter(new FileWriter("d:\\2.txt"));
        //读取数据
        //循环取出数据
        String str = null;
        while ((str = in.readLine()) != null) {
            System.out.println(str);
            //写入相关文件
            out.write(str);
            out.newLine();
        }

        //清楚缓存
        out.flush();
        //关闭流
        in.close();
        out.close();
Reader、PrintWriter(PrintWriter这个很好用,在写数据的同事可以格式化)
   //读取文件(字节流)
        Reader in = new InputStreamReader(new FileInputStream("d:\\1.txt"),"GBK");
        //写入相应的文件
        PrintWriter out = new PrintWriter(new FileWriter("d:\\2.txt"));
        //读取数据
        //循环取出数据
        byte[] bytes = new byte[1024];
        int len = -1;
        while ((len = in.read()) != -1) {
            System.out.println(len);
            //写入相关文件
            out.write(len);
        }
        //清楚缓存
        out.flush();
        //关闭流
        in.close();
out.close();基本的几种用法就这么多,当然每一个读写的使用都是可以分开的。为了更好的来使用io。流里面的读写,建议使用BufferedInputStream、BufferedOutputStream
Scanner
Scanner,从JDK1.5开始提供的API,特点是可以按行读取、按分割符去读取文件数据,既可以读取String类型,也可以读取Int类型、Long类型等基础数据类型的数据。
@Test
void testReadFile1() throws IOException {
   //文件内容:Hello World|Hello Zimug
   String fileName = "D:\\data\\test\\newFile4.txt";

   try (Scanner sc = new Scanner(new FileReader(fileName))) {
      while (sc.hasNextLine()) {  //按行读取字符串
         String line = sc.nextLine();
         System.out.println(line);
      }
   }

   try (Scanner sc = new Scanner(new FileReader(fileName))) {
      sc.useDelimiter("\\|");  //分隔符
      while (sc.hasNext()) {   //按分隔符读取字符串
         String str = sc.next();
         System.out.println(str);
      }
   }

   //sc.hasNextInt() 、hasNextFloat() 、基础数据类型等等等等。
   //文件内容:1|2
   fileName = "D:\\data\\test\\newFile5.txt";
   try (Scanner sc = new Scanner(new FileReader(fileName))) {
      sc.useDelimiter("\\|");  //分隔符
      while (sc.hasNextInt()) {   //按分隔符读取Int
          int intValue = sc.nextInt();
         System.out.println(intValue);
      }
   }
}
Files.lines (Java 8)
如果你是需要按行去处理数据文件的内容,这种方式是我推荐大家去使用的一种方式,代码简洁,使用java 8的Stream流将文件读取与文件处理有机融合。
@Test
void testReadFile2() throws IOException {
   String fileName = "D:\\data\\test\\newFile.txt";

   // 读取文件内容到Stream流中,按行读取
   Stream<String> lines = Files.lines(Paths.get(fileName));

   // 随机行顺序进行数据处理
   lines.forEach(ele -> {
      System.out.println(ele);
   });
}
forEach获取Stream流中的行数据不能保证顺序,但速度快。如果你想按顺序去处理文件中的行数据,可以使用forEachOrdered,但处理效率会下降。
// 按文件行顺序进行处理
lines.forEachOrdered(System.out::println);
或者利用CPU多和的能力,进行数据的并行处理parallel(),适合比较大的文件。
// 按文件行顺序进行处理
lines.parallel().forEachOrdered(System.out::println);
也可以把Stream<String>转换成List<String>,但是要注意这意味着你要将所有的数据一次性加载到内存,要注意java.lang.OutOfMemoryError
// 转换成List<String>, 要注意java.lang.OutOfMemoryError: Java heap space
List<String> collect = lines.collect(Collectors.toList());
Files.readAllLines
这种方法仍然是java8 为我们提供的,如果我们不需要Stream<String>,我们想直接按行读取文件获取到一个List<String>,就采用下面的方法。同样的问题:这意味着你要将所有的数据一次性加载到内存,要注意java.lang.OutOfMemoryError
@Test
void testReadFile3() throws IOException {
   String fileName = "D:\\data\\test\\newFile3.txt";

   // 转换成List<String>, 要注意java.lang.OutOfMemoryError: Java heap space
   List<String> lines = Files.readAllLines(Paths.get(fileName),
               StandardCharsets.UTF_8);
   lines.forEach(System.out::println);

}
Files.readString(JDK 11)
从 java11开始,为我们提供了一次性读取一个文件的方法。文件不能超过2G,同时要注意你的服务器及JVM内存。这种方法适合快速读取小文本文件。
@Test
void testReadFile4() throws IOException {
   String fileName = "D:\\data\\test\\newFile3.txt";

   // java 11 开始提供的方法,读取文件不能超过2G,与你的内存息息相关
   //String s = Files.readString(Paths.get(fileName));
}
Files.readAllBytes()
如果你没有JDK11(readAllBytes()始于JDK7),仍然想一次性的快速读取一个文件的内容转为String,该怎么办?先将数据读取为二进制数组,然后转换成String内容。这种方法适合在没有JDK11的请开给你下,快速读取小文本文件。
@Test
void testReadFile5() throws IOException {
   String fileName = "D:\\data\\test\\newFile3.txt";

   //如果是JDK11用上面的方法,如果不是用这个方法也很容易
   byte[] bytes = Files.readAllBytes(Paths.get(fileName));

   String content = new String(bytes, StandardCharsets.UTF_8);
   System.out.println(content);
}
经典管道流的方式
@Test
void testReadFile6() throws IOException {
   String fileName = "D:\\data\\test\\newFile3.txt";

   // 带缓冲的流读取,默认缓冲区8k
   try (BufferedReader br = new BufferedReader(new FileReader(fileName))){
      String line;
      while ((line = br.readLine()) != null) {
         System.out.println(line);
      }
   }

   //java 8中这样写也可以
   try (BufferedReader br = Files.newBufferedReader(Paths.get(fileName))){
      String line;
      while ((line = br.readLine()) != null) {
         System.out.println(line);
      }
   }

}
这种方式可以通过管道流嵌套的方式,组合使用,比较灵活。比如我们
想从文件中读取java Object就可以使用下面的代码,前提是文件中的数据是ObjectOutputStream写入的数据,才可以用ObjectInputStream来读取。
try (FileInputStream fis = new FileInputStream(fileName);
     ObjectInputStream ois = new ObjectInputStream(fis)){
   ois.readObject();
}
Java7新增文件IO类
在java中文件或是目录习惯用java.io.File对象来表示,但是File类有很多缺陷
它的很多方法不能抛出异常
它的delete方法经常莫名其妙的失败等,旧的File类经常是程序失败的根源。
因此在Java7中有了更好的替代:java.nio.file.Path及java.nio.file.Files。
Path接口的名字非常恰当,就是表示路径的,API中讲Path对象可以是一个文件,一个目录,或是一个符号链接,也可以是一个根目录。 用法很简单。创建Path并不会创建物理文件或是目录,path实例经常引用并不存在的物理对象,要真正创建文件或是目录,需要用到Files类。
Files类是一个非常强大的类,它提供了处理文件和目录以及读取文件和写入文件的静态方法。 可以用它创建和删除路径。复制文件。检查路径是否存在等。 此外。Files还拥有创建流对象的方法。

Paths
Paths类仅由静态方法组成,通过转换路径字符串返回Path或URI。
- 因为就两个方法用来生成Path对象,以供Path和Files使用;而Path也经常由Paths来生成,又或者File类有一个toPath();方法可以使用
创建Paths
static Path get(String first, String... more)
//将路径字符串或连接到路径字符串的字符串序列转换为 Path,可以get("c:/abc");或者get("c:","abc"),注意这里可以有多个参数String... more代表n个参数,这个比较常用
static Path get(URI uri)
//将给定的URI转换为Path对象
Path
Path就是取代File的,用于来表示文件路径和文件。可以有多种方法来构造一个Path对象来表示一个文件路径,或者一个文件:
– 该接口的实现是不可变且安全的,可供多个并行线程使用。
创建Path
Path toPath()
//File类对象方法--返回一个java.nio.file.Path对象
abstract Path getPath(String first, String... more)
//FileSystem对象方法--将路径字符串或从路径字符串连接起来的一系列字符串转换为 Path 。
创建Path的三种方式
Path path=FileSystems.getDefault().getPath("d:/users/日记5.txt");
//并没有实际创建路径,而是一个指向d:/users/日记5.txt路径的引用

Path path=Paths.get("d:/users/日记5.txt");                                              //Paths类提供了这个快捷方法,直接通过它的静态get方法创建path

Path path= = new File("d:/users/日记5.txt").toPath();
Path常用方法
Path接口没什么判断方法,其实更多的判断和操作都在Files工具类里面
boolean isAbsolute()
//告诉这条路是否是绝对的
boolean endsWith(Path other)
//测试此路径是否以给定的路径结束
boolean endsWith(String other)
//测试此路径是否以给定字符串结束,如"c:/a/banana/cat"可以以"/banana/cat"结尾,但不能以"t"结尾
boolean startsWith(Path other)
//测试此路径是否以给定的路径开始。
boolean startsWith(String other)
//测试此路径是否以给定字符串开始,跟上面一样规律

Path getFileName()
//将此路径表示的文件或目录的名称返回为 Path对象,文件名或文件夹名,不含路径
Path getName(int index)
//返回此路径的名称元素作为 Path对象。目录中最靠近root的为0,最远的为(count-1),count由下面的方法获得
int getNameCount()
//返回路径中的名称元素的数量。0则只有root
Path getParent()
//返回 父路径,如果此路径没有父返回null,如/a/b/c返回/a/b,配合下面的方法消除"."或".."
Path normalize()
//返回一个路径,该路径是冗余名称元素的消除。如消除掉"."、".."
Path getRoot()
//返回此路径的根组分作为 Path对象,或 null如果该路径不具有根组件。如返回"c:/"
Path relativize(Path other)
//构造此路径和给定路径之间的相对路径。有点难理解,p1-"Topic.txt",p2-"Demo.txt",p3-"/Java/JavaFX/Topic.txt",p4-"/Java/2011";;那么p1和p2的结果是"../Demo.txt";;p2和p1的结果是"../Topic.txt";;p3和p4的结果是"../../2011";;p4和p3的结果是"../JavaFX/Topic.txt"
Path resolve(String other)
//将给定的路径字符串转换为 Path。如"c:/a/b"和字符串"c.txt"的结果是"c:/a/b/c.txt";更像是拼接
Path resolveSibling(String other)
//将给定的路径字符串转换为 Path。如"c:/a/b.txt"和字符串"c.txt"的结果是"c:/a/c.txt";更像是替换
Path subpath(int beginIndex, int endIndex)
//返回一个相对的 Path ,它是该路径的名称元素的子序列,如"d:/a/b/c.txt"参数为(1,3)返回一个"b/c.txt"
Path toAbsolutePath()
//返回表示此路径的绝对路径的 Path对象。包括盘符和文件名或文件夹名

Iterator<Path> iterator()
//返回此路径的名称元素的迭代器。"c:/a/b/c.txt"的迭代器可以next出以下"a""b""c.txt"
File toFile()
//返回表示此路径的File对象
Files
Files类只包含对文件,目录或其他类型文件进行操作的静态方法。主要和Path接口的对象进行配合使用
判断方法:
static boolean exists(Path path, LinkOption... options)
//测试文件是否存在。
static boolean notExists(Path path, LinkOption... options)
//测试此路径所在的文件是否不存在。
static boolean isDirectory(Path path, LinkOption... options)
//测试文件是否是目录。
static boolean isExecutable(Path path)
//测试文件是否可执行。
static boolean isHidden(Path path)
//告知文件是否被 隐藏 。
static boolean isReadable(Path path)
//测试文件是否可读。
static boolean isRegularFile(Path path, LinkOption... options)
//测试文件是否是具有不透明内容的常规文件。说实话,我也不太懂常规文件指的是啥
static boolean isSameFile(Path path, Path path2)
//测试两个路径是否找到相同的文件。
static boolean isSymbolicLink(Path path)
//测试文件是否是符号链接。//
static boolean isWritable(Path path)
//测试文件是否可写。
删除方法
static boolean deleteIfExists(Path path)
//删除文件(如果存在)。
static void delete(Path path)
//删除文件。
复制方法
static long copy(InputStream in, Path target, CopyOption... options)
//将输入流中的所有字节复制到文件。
//关于CopyOption则是一个被继承的接口主要有枚举类StandardCopyOption和LinkOption
//   1.StandardCopyOption
//			REPLACE_EXISTING(也就是替换覆盖)
//          COPY_ATTRIBUTES(将源文件的文件属性信息复制到目标文件中)
//			ATOMIC_MOVE(原子性的复制)都是字面意思
//   2.LinkOption
//			NOFOLLOW_LINKS
static long copy(Path source, OutputStream out)
//将文件中的所有字节复制到输出流。
static Path copy(Path source, Path target, CopyOption... options)
//将文件复制到目标文件。
移动和重命名方法
static Path move(Path source, Path target, CopyOption... options)
//将文件移动或重命名为目标文件。
创建文件和文件夹方法
static Path createDirectories(Path dir, FileAttribute<?>... attrs)
//首先创建所有不存在的父目录来创建目录。
static Path createDirectory(Path dir, FileAttribute<?>... attrs)
//创建一个新的目录。
static Path createFile(Path path, FileAttribute<?>... attrs)
//创建一个新的和空的文件,如果该文件已存在失败。
文件属性方法
static <V extends FileAttributeView> V getFileAttributeView(Path path, 类<V> type, LinkOption... options)
//返回给定类型的文件属性视图。指定六个视图其中一种,上面一开始有点到。拿到的xxxAttributeView会有一个跟下面一样名字的readAttributes方法来得到一个xxxAttributes真正的获取操作就全是在这个xxxAttributes类的对象里get啦
static <A extends BasicFileAttributes> A readAttributes(Path path, 类<A> type, LinkOption... options)
//读取文件的属性作为批量操作。指定一个xxxAttributes,得到一个实例,通过里面的方法得到时间等基本属性

static Object getAttribute(Path path, String attribute, LinkOption... options)
//读取文件属性的值。这个 String attributes 参数的语法固定是以 view-name:comma-separated-attributes 的形式;view-name指定视图名如basic,posix,acl等,不写默认为basic;有写默认要加":";可以用"basic:*"或"*"读取所有,又或者用"basic:size,lastModifiedTime"读取大小和修改时间。具体还有那些属性可以看具体指定的类,比如basic视图就看BasicFileAttributes这个接口都有哪些方法,可以读取哪些文件属性。同理,下面的 String attributes 一样是这个理
static Map<String,Object> readAttributes(Path path, String attributes, LinkOption... options)
//读取一组文件属性作为批量操作。
static Path setAttribute(Path path, String attribute, Object value, LinkOption... options)
//设置文件属性的值。

/* 下面这些也是获取属性的方法,不过还没研究到是怎么用的 */
static FileTime getLastModifiedTime(Path path, LinkOption... options)
//返回文件的上次修改时间。
static UserPrincipal getOwner(Path path, LinkOption... options)
//返回文件的所有者。
static Set<PosixFilePermission> getPosixFilePermissions(Path path, LinkOption... options)
//返回文件的POSIX文件权限。
static Path setLastModifiedTime(Path path, FileTime time)
//更新文件上次修改的时间属性。
static Path setOwner(Path path, UserPrincipal owner)
//更新文件所有者。
static Path setPosixFilePermissions(Path path, Set<PosixFilePermission> perms)
//设置文件的POSIX权限。
static long size(Path path)
//返回文件的大小(以字节为单位)。
读取、编辑文件内容方法
static BufferedReader newBufferedReader(Path path)
//打开一个文件进行阅读,返回一个 BufferedReader以高效的方式从文件读取文本。
static BufferedReader newBufferedReader(Path path, Charset cs)
//打开一个文件进行阅读,返回一个 BufferedReader ,可以用来以有效的方式从文件读取文本。
static BufferedWriter newBufferedWriter(Path path, Charset cs, OpenOption... options)
//打开或创建一个写入文件,返回一个 BufferedWriter ,可以用来以有效的方式将文本写入文件。
static BufferedWriter newBufferedWriter(Path path, OpenOption... options)
//打开或创建一个写入文件,返回一个 BufferedWriter以高效的方式写入文件。
static SeekableByteChannel newByteChannel(Path path, OpenOption... options)
//打开或创建文件,返回可访问的字节通道以访问该文件。
static SeekableByteChannel newByteChannel(Path path, Set<? extends OpenOption> options, FileAttribute<?>... attrs)
//打开或创建文件,返回可访问的字节通道以访问该文件。
static InputStream newInputStream(Path path, OpenOption... options)
//打开一个文件,返回输入流以从文件中读取。
static OutputStream newOutputStream(Path path, OpenOption... options)
//打开或创建文件,返回可用于向文件写入字节的输出流。
static byte[] readAllBytes(Path path)
//读取文件中的所有字节。
static List<String> readAllLines(Path path)
//从文件中读取所有行。
static List<String> readAllLines(Path path, Charset cs)
//从文件中读取所有行。
static Path write(Path path, byte[] bytes, OpenOption... options)
//将字节写入文件。
static Path write(Path path, Iterable<? extends CharSequence> lines, Charset cs, OpenOption... options)
//将文本行写入文件。
static Path write(Path path, Iterable<? extends CharSequence> lines, OpenOption... options)
//将文本行写入文件。
以上方法适用于处理中等长度的文本文件,如果要处理的文件长度比较大,或者是二进制文件,那么还是应该使用流
遍历文件列表方法
- newDirectoryStream只是遍历当前Path的子目录列表,或者写一个方法里面递归调用实现遍历到底;
- walk则是可以通过maxDepth参数来决定遍历的深度,后面的FileVisitOption参数可有可无;
- list类似于newDirectoryStream,区别是walk和newDirectoryStream是递归的,list是非递归的
static DirectoryStream<Path> newDirectoryStream(Path dir)
//打开一个目录,返回一个DirectoryStream以遍历目录中的所有条目。最好用 try-with-resources 构造,可以自动关闭资源。返回的 DirectoryStream<Path> 其实可以直接使用 Iterator或者for循环 遍历每一个 dir 下面的文件或目录
static DirectoryStream<Path> newDirectoryStream(Path dir, DirectoryStream.Filter<? super Path> filter)
//上面方法的重载,通过实现参数二(有一个 boolean accept(Path p) 方法来判断文件是否符合需要)来达到过滤的目的。如accept方法中写"return (Files.size(p) > 8192L);"来匹配大于8k的文件
static DirectoryStream<Path> newDirectoryStream(Path dir, String glob)
//上面方法的重载,可以通过参数二作为过滤匹配出对应的文件。如 newDirectoryStream(dir, "*.java") 用于遍历目录里所有java后缀的文件

static Stream<Path> walk(Path start, FileVisitOption... options)
//深度优先遍历。返回一个 Stream ,它通过 Path根据给定的起始文件的文件树懒惰地填充 Path 。
static Stream<Path> walk(Path start, int maxDepth, FileVisitOption... options)
//深度优先遍历。返回一个 Stream ,它是通过走根据给定的起始文件的文件树懒惰地填充 Path 。

static Stream<Path> list(Path dir)
//返回一个懒惰的填充 Stream ,其元素是 Stream中的条目。返回的 Stream 里封装了一个 DirectoryStream 用于遍历。
Path和Files使用
import org.junit.Test;
import java.io.*;
import java.net.MalformedURLException;
import java.net.URI;
import java.net.URISyntaxException;
import java.nio.charset.StandardCharsets;
import java.nio.file.FileSystems;
import java.nio.file.Files;
import java.nio.file.Path;
import java.nio.file.Paths;
import java.nio.file.attribute.PosixFilePermission;
import java.util.HashSet;
import java.util.List;
import java.util.Set;
import java.util.stream.Stream;

public class PathAndFilesTest {
    /**
     * 创建Path
     */
    @Test
    public void createPath() throws URISyntaxException, MalformedURLException {
        //1.Paths
        Path path = Paths.get("F:/测试数据.csv");
        System.out.println(path.getFileName());
        Path path1 = Paths.get(new URI("file:///f:/测试数据.csv"));

        //2.FileSystems
        Path path2 = FileSystems.getDefault().getPath("F:/测试数据.csv");

        //3.File
        Path path3 = new File("F:/测试数据.csv").toPath();
    }


    /**
     * 创建一个空文件/文件夹
     */
    @Test
    public void create() throws IOException {
        //文件夹
        Path path = Paths.get("F:/hello");
        if (!Files.exists(path)) {//如果不存在
            Files.createDirectory(path);
            //创建多个目录
            //Files.createDirectories(path);
        }

        //文件
        Path path1 = Paths.get("F:/helloFile.txt");
        if (!Files.exists(path1)) {//如果不存在
            Files.createFile(path1);
        }
    }

    /**
     * 文件属性
     */
    @Test
    public void getFileProperties() throws IOException {
        Path path = Paths.get("F:/测试数据.csv");
        System.out.println(Files.getLastModifiedTime(path));//最后修改时间:2019-05-22T02:52:45.625094Z
        System.out.println(Files.getOwner(path));//拥有者:DESKTOP-GE36VVD\87772 (User)
        //System.out.println(Files.getPosixFilePermissions(path));//权限,非admin可能会报错
        System.out.println(Files.size(path));//文件大小: 34207517
    }

    /**
     * 读取一个文本文件
     */
    @Test
    public void readText() throws IOException {
        Path path = Paths.get("F:/test.txt");
        //通过bufferedReader读取
        BufferedReader bufferedReader = Files.newBufferedReader(path, StandardCharsets.UTF_8);///该文件编码是什么newBufferedReader就必须指定什么字符集,否则报错

        StringBuilder sb = new StringBuilder();
        String tempString = null;
        while ((tempString = bufferedReader.readLine()) != null) {
            sb = sb.append(tempString + "\n");
        }
        System.out.println(sb);


        //通过Files方法readAllLines
        List<String> strings = Files.readAllLines(path);
        strings.forEach(System.out::println);
    }

    /**
     * 拿到文件输入流
     *
     * @throws IOException
     */
    @Test
    public void getInputStream() throws IOException {
        Path path = Paths.get("F:/test.txt");
        InputStream inputStream = Files.newInputStream(path);

        //转换字符流后在包装成缓冲流
        BufferedReader bufferedReader = new BufferedReader(new InputStreamReader(inputStream, "UTF-8"));

        StringBuilder sb = new StringBuilder();
        String tempString = null;
        while ((tempString = bufferedReader.readLine()) != null) {
            sb = sb.append(tempString + "\n");
        }
        System.out.println(sb);
    }

    /**
     * 文件写操作
     */
    @Test
    public void writeFile() throws IOException {
        Path path = Paths.get("F:/writeFile.txt");

        //获取写入流
        BufferedWriter bufferedWriter = Files.newBufferedWriter(path);

        //执行写入操作
        String str = "write file test";
        bufferedWriter.write(str);

        //关闭资源
        bufferedWriter.flush();
        bufferedWriter.close();
    }

    /**
     * 遍历一个文件夹
     */
    @Test
    public void traverseDirectory() throws IOException {
        Path path = Paths.get("F:/test");
        Stream<Path> list = Files.list(path);
        list.forEach(p -> {
            System.out.println(p.getFileName());
        });
    }

    /**
     * 遍历文件树
     */
    @Test
    public void traverseTree() throws IOException {
        Path path = Paths.get("F:/test/");
        Stream<Path> walk = Files.walk(path);
        walk.forEach(path1 -> {
//      System.out.println(path1.getRoot());//根目录
            System.out.println(path1.getFileName());//文件名
//      System.out.println(path1.getParent());//上级目录
//      System.out.println(path1.getFileSystem());//文件系统
        });
        //还有种方式Files.walkFileTree()
    }

    /**
     * 文件复制
     */
    @Test
    public void copyFile() throws IOException {
        Path src = Paths.get("F:/测试数据.csv");
        Path dest = Paths.get("F:/test/Copy测试数据.csv");
        Files.copy(src, dest);
    }

    /**
     * 读取权限见上面示例,设置权限
     */
    @Test
    public void writePermission() throws IOException {
        Path path = Paths.get("F:/test/导出测试数据.xlsx");
        Set<PosixFilePermission> permissionSet = new HashSet<>();
        permissionSet.add(PosixFilePermission.GROUP_WRITE);
        permissionSet.add(PosixFilePermission.OWNER_EXECUTE);
        Files.setPosixFilePermissions(path, permissionSet);
    }

/**
	 * 判断方法
	 * @throws IOException
	 */
	@Test
	public void judge() throws IOException {
		Path path1 = Paths.get("f:\\test", "Copy测试数据.csv");
		Path path2 = Paths.get("f:\\测试数据.csv");
//		boolean exists(Path path, LinkOption … opts) : 判断文件是否存在
		System.out.println(Files.exists(path2, LinkOption.NOFOLLOW_LINKS));//true

//		boolean isDirectory(Path path, LinkOption … opts) : 判断是否是目录
		//不要求此path对应的物理文件存在。
		System.out.println(Files.isDirectory(path1, LinkOption.NOFOLLOW_LINKS));//false

//		boolean isRegularFile(Path path, LinkOption … opts) : 判断是否是文件

//		boolean isHidden(Path path) : 判断是否是隐藏文件
		//要求此path对应的物理上的文件需要存在。才可判断是否隐藏。否则,抛异常。
//		System.out.println(Files.isHidden(path1));

//		boolean isReadable(Path path) : 判断文件是否可读
		System.out.println(Files.isReadable(path1));//true
//		boolean isWritable(Path path) : 判断文件是否可写
		System.out.println(Files.isWritable(path1));//true
//		boolean notExists(Path path, LinkOption … opts) : 判断文件是否不存在
		System.out.println(Files.notExists(path1, LinkOption.NOFOLLOW_LINKS));//false
	}
}


	/**
	 * StandardOpenOption.READ:表示对应的Channel是可读的。
	 * StandardOpenOption.WRITE:表示对应的Channel是可写的。
	 * StandardOpenOption.CREATE:如果要写出的文件不存在,则创建。如果存在,忽略
	 * StandardOpenOption.CREATE_NEW:如果要写出的文件不存在,则创建。如果存在,抛异常
	 */
	@Test
	public void ioStream() throws IOException {
		Path path1 = Paths.get("f:\\test", "copyTest.txt");

//		InputStream newInputStream(Path path, OpenOption…how):获取 InputStream 对象
		InputStream inputStream = Files.newInputStream(path1, StandardOpenOption.READ);

//		OutputStream newOutputStream(Path path, OpenOption…how) : 获取 OutputStream 对象
		OutputStream outputStream = Files.newOutputStream(path1, StandardOpenOption.WRITE, StandardOpenOption.CREATE);


//		SeekableByteChannel newByteChannel(Path path, OpenOption…how) : 获取与指定文件的连接,how 指定打开方式。
		SeekableByteChannel channel = Files.newByteChannel(path1, StandardOpenOption.READ, StandardOpenOption.WRITE, StandardOpenOption.CREATE);

//		DirectoryStream<Path>  newDirectoryStream(Path path) : 打开 path 指定的目录
		Path path2 = Paths.get("f:\\test");
		DirectoryStream<Path> directoryStream = Files.newDirectoryStream(path2);
		Iterator<Path> iterator = directoryStream.iterator();
		while (iterator.hasNext()) {
			System.out.println(iterator.next());
		}
	}
FileTime对象
表示文件时间戳属性的值,可能会在设置文件最后更新属性时使用到
static FileTime fromMillis(long value)
//返回一个 FileTime以 FileTime单位表示给定值。
long toMillis()
//返回以毫秒为单位的值。
String toString()
//返回此 FileTime的字符串表示 FileTime 。
例子:
/**
 * 可能你要从文件属性中的FileTime或者到一个Date对象
 */
Path pathObj = Paths.get("C:/a/b/c.txt");
BasicFileAttributes attrs = Files.readAttributes(pathObj, BasicFileAttributes.class);
Data date = new Date(attrs.lastModifiedTime().toMillis());

/**
 * 又或者可能你要人为地修改这个文件时间属性,需要一个FileTime
 */
Path path = Paths.get("C:/a/b/c.txt");
long time = System.currentTimeMillis();
FileTime fileTime = FileTime.fromMillis(time);
try{
  Files.setAttribute(path, "basic:lastModifiedTime", fileTime,LinkOption.NOFOLLOW_LINKS);
}catch (IOException e) {
    System.err.println(e);
}
RandomAccessFile(大文件)
RandomAccessFile既可以读取文件内容,也可以向文件输出数据。同时,RandomAccessFile支持“随机访问”的方式,程序快可以直接跳转到文件的任意地方来读写数据。
由于RandomAccessFile可以自由访问文件的任意位置,所以如果需要访问文件的部分内容,而不是把文件从头读到尾,使用RandomAccessFile将是更好的选择。
与OutputStream、Writer等输出流不同的是,RandomAccessFile允许自由定义文件记录指针,RandomAccessFile可以不从开始的地方开始输出,因此RandomAccessFile可以向已存在的文件后追加内容。如果程序需要向已存在的文件后追加内容,则应该使用RandomAccessFile。
RandomAccessFile的方法虽然多,但它有一个最大的局限,就是只能读写文件,不能读写其他IO节点。
RandomAccessFile 使用
RandomAccessFile raf = new RandomAccessFile(文件,r);
RandomAccessFile raf = new RandomAccessFile(文件,rw);RandomAccessFile类有两个构造函数,其实这两个构造函数基本相同,只不过是指定文件的形式不同——一个需要使用String参数来指定文件名,一个使用File参数来指定文件本身。除此之外,创建RandomAccessFile对象时还需要指定一个mode参数,该参数指定RandomAccessFile的访问模式,一共有4种模式。
- “r” : 以只读方式打开。调用结果对象的任何 write 方法都将导致抛出 IOException。
- “rw”: 打开以便读取和写入。
- “rws”: 打开以便读取和写入。相对于 “rw”,”rws” 还要求对“文件的内容”或“元数据”的每个更新都同步写入到基础存储设备。
- “rwd” : 打开以便读取和写入,相对于 “rw”,”rwd” 还要求对“文件的内容”的每个更新都同步写入到基础存储设备。
RandomAccessFile既可以读文件,也可以写文件,所以类似于InputStream的read()方法,以及类似于OutputStream的write()方法,RandomAccessFile都具备。除此之外,RandomAccessFile具备两个特有的方法,来支持其随机访问的特性。
RandomAccessFile对象包含了一个记录指针,用以标识当前读写处的位置,当程序新创建一个RandomAccessFile对象时,该对象的文件指针记录位于文件头(也就是0处),当读/写了n个字节后,文件记录指针将会后移n个字节。除此之外,RandomAccessFile还可以自由移动该记录指针。下面就是RandomAccessFile具有的两个特殊方法,来操作记录指针,实现随机访问:
long getFilePointer( ):返回文件记录指针的当前位置 void seek(long pos ):将文件指针定位到pos位置大文件上传
后端:
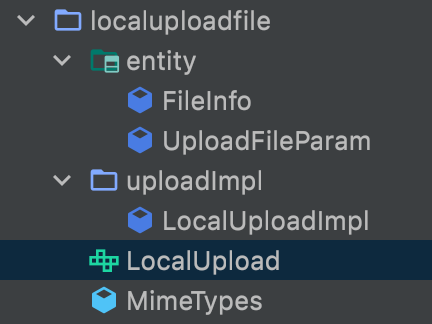
上传的文件存储信息
FileInfo 实体类
/**
 * 上传的文件存储信息
 * @author xujiahui
 */
class FileInfo {

    /** 文件的哈希值,或者MD5值 */
    var hash:String?=null


    /**  "文件的名称" */
    var  name:String?=null

    /** "文件类型" */
    var  type:String?=null

    /** "文件上传路径" */
    var  path:String?=null

    /** "文件创建时间" */
    var  createTime:Long?=null

}
上传文件需要用的基本参数
UploadFileParam 实体类
import org.springframework.web.multipart.MultipartFile;

/**
 * 上传文件需要用的基本参数
 * @author xujiahui
 */
class UploadFileParam {

    /**
     * "任务ID"
     */
    var id: String?=null

    /**
     * 总分片数量
     */
    var chunks: Int?=null

    /**
     * 当前为第几块分片(第一个块是 0,注意不是从 1 开始的)
     */
    var chunk: Int?=null

    /**
     * 当前分片大小
     */
    var size: Long = 0L

    /**
     * 当前文件名称
     */
    var name: String?=null

    /**
     * 当前文件的分片对象
     */
    var file: MultipartFile?=null

    /**
     * 当前文件的MD5,不是分片的
     */
    var md5: String?=null

}
用于根据文件确定文件的mimeType的实用工具类
MimeTypes 工具类
import cn.hutool.core.io.FileTypeUtil;
import cn.hutool.core.util.StrUtil;
import lombok.SneakyThrows;
import lombok.extern.slf4j.Slf4j;

import java.io.*;
import java.util.HashMap;
import java.util.StringTokenizer;

/**
 * <p>用于根据文件确定文件的mimeType的实用工具类</p>
 * <p>2020-12-20 13:02</p>
 **/
@Slf4j
public class MimeTypes {

    /**
     * The default MIME type
     */
    private static final String DEFAULT_MIMETYPE = "application/octet-stream";

    /**
     * 当前实例[单例]
     */
    private static MimeTypes mimetypes = null;

    /**
     * 对mime类型的映射
     */
    private final HashMap<String, String> extensionToMimetypeMap = new HashMap<>();

    /**
     * 禁止实例化
     */
    private MimeTypes() {
    }

    /**
     * 获取 MimeTypes 实例
     */
    @SneakyThrows
    public synchronized static MimeTypes getInstance() {
        if (mimetypes != null) {
            return mimetypes;
        }

        mimetypes = new MimeTypes();
        try (InputStream is = mimetypes.getClass().getResourceAsStream("/mime.types")) {
            if (is != null) {
                // 加载文件 mime.types
                log.debug("Loading mime types from file in the classpath: mime.types");
                mimetypes.loadMimeTypes(is);
            } else {
                // 找不到文件 mime.types
                log.warn("Unable to find 'mime.types' file in classpath");
            }
        }

        return mimetypes;
    }

    /**
     * 自定义需要加载的 mime.types
     *
     * @param is 包含有mime类型的流
     */
    @SneakyThrows
    public void loadMimeTypes(InputStream is) {
        BufferedReader br = new BufferedReader(new InputStreamReader(is));
        String line;

        while ((line = br.readLine()) != null) {
            line = line.trim();

            // 忽略注释和空行
            if (line.startsWith("#") || line.length() == 0) {
                continue;
            }

            StringTokenizer st = new StringTokenizer(line, " \t");
            if (st.countTokens() <= 1) {
                continue;
            }

            String extension = st.nextToken();
            if (st.hasMoreTokens()) {
                String mimetype = st.nextToken();
                extensionToMimetypeMap.put(extension.toLowerCase(), mimetype);
            }
        }
    }

    /**
     * 根据文件名获取文件 mime 类型
     *
     * @param fileName 文件名
     * @return 返回文件对应的mime类型
     */
    public String getMimeTypes(String fileName) {
        int lastPeriodIndex = fileName.lastIndexOf(".");
        if (lastPeriodIndex > 0 && lastPeriodIndex + 1 < fileName.length()) {
            String ext = fileName.substring(lastPeriodIndex + 1).toLowerCase();
            if (extensionToMimetypeMap.containsKey(ext)) {
                return extensionToMimetypeMap.get(ext);
            }
        }

        return DEFAULT_MIMETYPE;
    }

    /**
     * 获取当前文件对应的 mime 类型
     *
     * @param file {@link File} 需要获取的文件
     * @return 返回文件对应的mime类型
     */
    public String getMimeTypes(File file) {
        if (!file.exists()) {
            return DEFAULT_MIMETYPE;
        }

        // 获取当前文件的扩展名
        String ext = FileTypeUtil.getType(file);
        if (StrUtil.isBlank(ext)) {
            return DEFAULT_MIMETYPE;
        }

        if (extensionToMimetypeMap.containsKey(ext.toLowerCase())) {
            return extensionToMimetypeMap.get(ext.toLowerCase());
        }

        return DEFAULT_MIMETYPE;
    }
}
文件上传接口
LocalUpload 接口
import com.linktopa.corex.ktsupport.localuploadfile.entity.UploadFileParam
import com.linktopa.corex.multipart.core.MultipartData
import org.springframework.web.multipart.MultipartFile
import java.io.File
import javax.servlet.http.HttpServletRequest

/**
 * LocalUpload
 * 本地文字上传接口
 * @constructor Create empty LocalUpload
 */
interface LocalUpload{

    /**
     * defaultPath
     * 默认存储路径
     */
    var defaultPath: String


    /**
     * checkFileMd5
     *
     * 秒传、断点的文件MD5验证
     * 根据文件路径获取要上传的文件夹下的 文件名.conf 文件
     * 通过判断 *.conf 文件状态来验证(有条件的可以使用redis来记录上传状态和文件地址)
     *
     * @param fileMd5      文件的MD5
     * @param fileName     文件名(包含文件格式)
     * @param confFilePath 分片配置文件全路径(不包含文件名)
     * @param tmpFilePath  上传的缓存文件全路径(不包含文件名)
     * @return
     */
    fun  checkFileMd5(
        fileMd5:String,
        fileName:String,
        confFilePath:String=defaultPath+"confFile",
        tmpFilePath:String=defaultPath+"file"
    ) : MultipartData

    /**
     * fragmentFileUploader
     *
     * 文件分片、断点续传上传程序
     * 创建 文件名.conf 文件记录已上传分片信息
     * 使用 RandomAccessFile(随机访问文件) 类随机指定位置写入文件,类似于合成分片
     * 检验分片文件是否全部上传完成,重命名缓存文件
     *
     * @param param        上传文件时 需要接收的基本参数信息
     * @param confFilePath 分片配置文件的路径,考虑到配置文件与缓存文件分开的情况(不包含文件名)
     * @param filePath     上传文件的路径,同时也是生成缓存文件的路径(不包含文件名)
     * @param chunkSize    每块分片的大小,单位:字节(这个值需要与前端JS的值保持一致) 5M=5242880
     * @param request      HTTP Servlet请求
     * @return
     */
    fun fragmentFileUploader(
        param: UploadFileParam,
        chunkSize:Long,
        request: HttpServletRequest,
        confFilePath:String=defaultPath+"confFile",
        filePath:String=defaultPath+"file"
    ):MultipartData

    /**
     * regularFileUploader
     *
     * 普通的文件上传程序、不使用分片、断点续传
     *
     * @param param    上传文件时 需要接收的基本参数信息
     * @param filePath 上传文件的路径,不包含文件名 log/uploader
     * @return
     */
    fun regularFileUploader(
        param: UploadFileParam,
        filePath:String=defaultPath+"file"
    ):MultipartData

    /**
     * regularFileUploader
     *
     * 普通的文件上传程序、使用默认上传路径
     *
     * @param file 文件流信息
     * @return
     */
    fun regularFileUploader(
        file: MultipartFile,
        filePath:String=defaultPath+"file"
    ):MultipartData

    /**
     * renameFile
     *
     * 用于上传成功后重命名文件
     *
     * @param toBeRenamed   需要重命名的文件对象
     * @param toFileNewName 文件新的名字
     * @return
     */
    fun renameFile(
        toBeRenamed:File,
        toFileNewName:String
    ):Boolean
}
本地上传文件实现类
LocalUploadImpl 实现类
import cn.hutool.core.io.FileUtil
import com.alibaba.fastjson.JSON
import com.alibaba.fastjson.JSONArray
import com.linktopa.corex.ktsupport.localuploadfile.entity.FileInfo
import com.linktopa.corex.ktsupport.localuploadfile.LocalUpload
import com.linktopa.corex.ktsupport.localuploadfile.MimeTypes
import com.linktopa.corex.ktsupport.localuploadfile.entity.UploadFileParam
import com.linktopa.corex.multipart.core.MultipartData
import org.apache.commons.fileupload.servlet.ServletFileUpload
import org.apache.commons.io.FileUtils.readFileToByteArray
import org.springframework.http.HttpStatus
import org.springframework.web.multipart.MultipartFile
import java.io.File
import java.io.IOException
import java.io.RandomAccessFile
import javax.servlet.http.HttpServletRequest
import kotlin.experimental.and

/**
 * LocalUploadImpl
 *
 * 本地上传文件实现类
 *
 * @constructor Create empty LocalUploadImpl
 */
class LocalUploadImpl : LocalUpload {

    override var defaultPath: String= System.getProperty("user.dir") + File.separatorChar + "files" + File.separatorChar

    override fun checkFileMd5(
        fileMd5: String,
        fileName: String,
        confFilePath: String,
        tmpFilePath: String
    ): MultipartData {
        val isParamEmpty = (fileMd5.isBlank()
                || fileName.isBlank()
                || confFilePath.isBlank()
                || tmpFilePath.isBlank())
        if (isParamEmpty) {
            throw Exception("参数值为空")
        }
        // 构建分片配置文件对象
        val confFile = File(confFilePath + File.separatorChar + fileName + ".conf")

        // 布尔值:上传的文件缓存对象是否存在
        val isTmpFileEmpty = File(
            tmpFilePath
                    + File.separatorChar + fileName + "_tmp"
        ).exists()

        // 分片记录文件 和 文件缓存文件 同时存在 则 状态码定义为 206
        if (confFile.exists() && isTmpFileEmpty) {
            val completeList: ByteArray = readFileToByteArray(confFile)
            val missChunkList: MutableList<String> = ArrayList()
            for (i in completeList.indices) {
                if (completeList[i] != Byte.MAX_VALUE) {
                    missChunkList.add(i.toString())
                }
            }
            return MultipartData().include("code",HttpStatus.PARTIAL_CONTENT.value())
                .include("message","文件已经上传了一部分")
                .include("data",JSONArray.parseArray(JSON.toJSONString(missChunkList)))
        }

        // 布尔值:上传的文件对象是否存在
        val isFileEmpty = File(tmpFilePath + File.separatorChar + fileName)
            .exists()
        // 上传的文件 和 配置文件 同时存在 则 当前状态码为 200
        return if (isFileEmpty && confFile.exists()) {
            MultipartData().include("code",HttpStatus.OK.value())
                .include("message", "文件已上传成功")
        } else MultipartData().include("code",HttpStatus.NOT_FOUND.value())
            .include("message", "文件不存在")
    }

    override fun fragmentFileUploader(
        param: UploadFileParam,
        chunkSize: Long,
        request: HttpServletRequest,
        confFilePath: String,
        filePath: String
    ): MultipartData {
        val isParamEmpty = (filePath.isBlank()
                ||confFilePath.isBlank() && param.file == null)
        if (isParamEmpty) {
            throw Exception("参数值为空")
        }
        // 判断enctype属性是否为multipart/form-data
        val isMultipart: Boolean = ServletFileUpload.isMultipartContent(request)
        require(isMultipart) { "上传内容不是有效的multipart/form-data类型." }

        return try {
            // 分片配置文件
            val confFile: File = FileUtil.file(
                FileUtil.mkdir(confFilePath),
                "${param.name}.conf"
            )
            val accessConfFile = RandomAccessFile(confFile, "rw")
            // 把该分段标记为 true 表示完成
            accessConfFile.setLength(param.chunks!!.toLong())
            accessConfFile.seek(param.chunk!!.toLong())
            accessConfFile.write(Byte.MAX_VALUE.toInt())
            accessConfFile.close()
            // _tmp的缓存文件对象
            val tmpFile: File = FileUtil.file(
                FileUtil.mkdir(filePath),
                "${param.name}_tmp"
            )
            // 随机位置写入文件
            val accessTmpFile = RandomAccessFile(tmpFile, "rw")
            val offset = chunkSize * param.chunk!!
            // 定位到该分片的偏移量、写入该分片数据、释放
            accessTmpFile.seek(offset)
            accessTmpFile.write(param.file!!.bytes)
            accessTmpFile.close()
            // 检查是否全部分片都成功上传
            val completeList = readFileToByteArray(confFile)
            var isComplete = Byte.MAX_VALUE
            var i = 0
            while (i < completeList.size && isComplete == Byte.MAX_VALUE) {
                // 与运算, 如果有部分没有完成则 isComplete 不是 Byte.MAX_VALUE
                isComplete = (isComplete and completeList[i])
                i++
            }
            if (isComplete != Byte.MAX_VALUE) {
                return MultipartData().include("code", HttpStatus.OK.value())
                    .include("message","文件上传成功")
            }
            val isSuccess: Boolean = param.name?.let { renameFile(tmpFile, it) } == true
            if (!isSuccess) {
                throw Exception("文件重命名时失败")
            }
            // 全部上传成功后构建文件对象
            val fileInfo: FileInfo = FileInfo().apply {
                hash=param.md5
                name=param.name
                type= MimeTypes.getInstance().getMimeTypes(param.name)
                path=tmpFile.parent + File.separatorChar + param.name
                createTime=System.currentTimeMillis()
            }
            MultipartData().include("code", HttpStatus.CREATED.value())
                    .include("message","文件上传完成")
                    .include("data",fileInfo)
        } catch (e: IOException) {
            e.printStackTrace()
            MultipartData().include("code",500).include("message","文件上传失败")
        }
    }

    override fun regularFileUploader(param: UploadFileParam, filePath: String): MultipartData {
        val isParamEmpty = (filePath.isBlank()
                || param.name==null && param.file == null)
        if (isParamEmpty) {
            throw Exception("参数值为空")
        }

        // 上传的文件夹
        val uploadFolder = File(filePath)
        // 创建文件夹
        if (!uploadFolder.exists() && !uploadFolder.mkdirs()) {
            return MultipartData().include("code", HttpStatus.FORBIDDEN.value())
                .include("message", "上传所需文件夹创建失败")
        }

        // 上传的文件
        val uploadFile = File(filePath + File.separatorChar + param.name)

        // 写入文件
        param.file?.transferTo(uploadFile)

        // 校验文件是否上传成功
        if (uploadFile.length() != param.file!!.size) {
            return MultipartData().include("code",500).include("message","文件上传失败")
        }

        // 上传成功后构建文件对象
        val fileInfo: FileInfo = FileInfo().apply {
            hash=param.md5
            name=param.name
            type= MimeTypes.getInstance().getMimeTypes(param.name)
            path=uploadFile.path
            createTime=System.currentTimeMillis()
        }
        return MultipartData().include("code", HttpStatus.CREATED.value())
            .include("message","文件上传完成")
            .include("data",fileInfo)
    }

    override fun regularFileUploader(file: MultipartFile,filePath: String): MultipartData {
        return regularFileUploader(
            UploadFileParam().apply {
                this.file=file
                this.name=file.originalFilename
            },filePath
        )
    }

    override fun renameFile(toBeRenamed: File, toFileNewName: String): Boolean {
        // 检查要重命名的文件是否存在,是否是文件
        if (!toBeRenamed.exists() || toBeRenamed.isDirectory) {
            return false
        }
        val newFile = File(
            toBeRenamed.parent
                    + File.separatorChar + toFileNewName
        )
        // 修改文件名
        return toBeRenamed.renameTo(newFile)
    }
}
前端
demo.js
let count = 0;
// 初始化上传控件
let uploader = $.uploaderInit({
    server: 'http://127.0.0.1:1000/core/uploader/demo1',
    pick: {
        id: '#picker',
        multiple: true
    },
    chunked: true,
    fileQueued: (file) => {
        count++;
        $("#thelist table>tbody").append(`
        <tr id="${file.id}" class="item" flag=0>
            <td class="index">${count}</td>
            <td class="info">${file.name}</td>
            <td class="size">${WebUploader.Base.formatSize(file.size)}</td>
            <td class="state">等待上传...</td>
            <td class="percentage"></td>
            <td class="operate">
                <button name="upload" data-type="start" data-fid="${file.id}" class="btn btn-warning up-start">开始</button>
                <button name="delete" data-fid="${file.id}" class="btn btn-error">删除</button>
            </td>
        </tr>`);
        // 绑定事件之前先解除绑定
        $("button[name=upload]").unbind('click');
        $("button[name=delete]").unbind('click');
        $("button[name=upload]").on('click', function () {
            let state = $(this).data('type');
            console.log(new Date().getTime());
            switch (state) {
                case 'start':
                    $(this).data('type', 'stop');
                    $(this).text('暂停');
                    uploader.upload(uploader.getFile($(this).data('fid'), true))
                    break;
                case 'stop':
                    $(this).data('type', 'retry')
                    $(this).text('开始');
                    uploader.stop(true);
                    break;
                case 'retry':
                    $(this).data('type', 'stop');
                    $(this).text('暂停');
                    uploader.upload(uploader.getFile($(this).data('fid'), true).id);
                    break;
            }
            return false;
        })
        $("button[name=delete]").on('click', function () {
            uploader.removeFile(uploader.getFile($(this).data('fid'), true));
            console.log($(this).data('fid'))
            $("#" + $(this).data('fid')).remove();
        })
    },
    uploadBeforeSend: (object, data, headers) => {
        let file = object.file;
        data.md5 = file.md5 || '';
        data.uid = file.uid;
    },
    uploadProgress: (file, percentage) => {
        $('#' + file.id).find('td.percentage').text(
            '上传中 '
            + Math.round(percentage * 100) + '%'
            + '(' + WebUploader.Base.formatSize(file.uploadRate) + '/s)');
    },
    uploadSuccess: (file, response) => {
        $('#' + file.id).find('td.state').text('已上传');
        console.log(response);
    },
    uploadError: (file, reason) => {
        $('#' + file.id).find('td.state').text('上传出错');
        console.error(reason)
    },
    beforeInit: () => {
        // 这个必须要写在实例化前面
        WebUploader.Uploader.register({
            'before-send-file': 'beforeSendFile',
            'before-send': 'beforeSend'
        }, {
            // 时间点1:所有分块进行上传之前调用此函数
            beforeSendFile: function (file) {
                let deferred = WebUploader.Deferred();
                (new WebUploader.Uploader()).md5File(file, 0, 5242880).progress(function (percentage) {
                    // 显示计算进度
                    console.log('计算md5进度:', percentage);
                    $('#' + file.id).find("td.state").text("校验MD5中...");
                }).then(function (val) {
                    file.md5 = val;
                    file.uid = WebUploader.Base.guid();
                    // 进行md5判断
                    $.ajax({
                        url: 'http://127.0.0.1:1000/core/uploader/checkFile',
                        type: 'GET',
                        showError: false,
                        global: false,
                        data: {
                            fileName: file.name,
                            md5: file.md5
                        },
                        success: (data) => {
                            console.log(data);
                            let status = data.code;
                            deferred.resolve();
                            switch (status) {
                                case "200":
                                    // 忽略上传过程,直接标识上传成功;
                                    uploader.skipFile(file);
                                    file.pass = true;
                                    break;
                                case "206":
                                    // 部分已经上传到服务器了,但是差几个模块。
                                    file.missChunks = data.data;
                                    console.log(file.missChunks);
                                    break;
                                default:
                                    break;
                            }
                        }
                    })
                })
                return deferred.promise();
            },
            // 时间点2:如果有分块上传,则每个分块上传之前调用此函数
            beforeSend: function (block) {
                let deferred = WebUploader.Deferred();
                // 当前未上传分块
                let missChunks = block.file.missChunks;
                // 当前分块
                let blockChunk = block.chunk;
                if (missChunks !== null && missChunks !== undefined && missChunks !== '') {
                    let flag = true;
                    for (let i = 0; i < missChunks.length; i++) {
                        if (blockChunk === parseInt(missChunks[i])) {
                            // 存在还未上传的分块
                            flag = false;
                            break;
                        }
                    }
                    if (flag) {
                        deferred.reject();
                    } else {
                        deferred.resolve();
                    }
                } else {
                    deferred.resolve();
                }
                return deferred.promise();
            }
        });
    }
});
demo.html
<!DOCTYPE html>
<html lang="en">
<head>
    <meta charset="UTF-8">
    <title>自定义 分片、缓存 文件路径 分片上传、断点续传 文件</title>

    <link rel="stylesheet" type="text/css" href="https://cdn.bootcss.com/bootstrap/3.3.7/css/bootstrap.min.css">
    <style type="text/css">

    .webuploader-container {
        position: relative;
    }

    .webuploader-element-invisible {
        position: absolute !important;
        clip: rect(1px 1px 1px 1px); /* IE6, IE7 */
        clip: rect(1px, 1px, 1px, 1px);
    }

    .webuploader-pick {
        position: relative;
        display: inline-block;
        cursor: pointer;
        /*background: #00b7ee;*/
        padding: 5px 5px;
        color: #fff;
        text-align: center;
        border-radius: 3px;
        overflow: hidden;
    }

    .webuploader-pick-hover {
        /*background: #00a2d4;*/
    }

    .webuploader-pick-disable {
        opacity: 0.6;
        pointer-events: none;
    }

    #picker {
        width: 86px;
        height: 40px;
        display: inline-block;
        line-height: 1.428571429;
        vertical-align: middle;
        margin: 0 12px 0 0;
    }

    .webuploader-domain {
        top: 0px !important;
        left: 0px !important;
    }
</style>
</head>
<body>


<div id="uploader" class="container">
    <pre>
    封装 web-uploader 上传控件 分片上传、断点续传大文件
    由于上传控件自身问题 暂停和开始 存在一定程度BUG
    适用于没有文件 暂停和开始的 业务需求
    </pre>
    <!--用来存放文件信息-->
    <div id="thelist" class="row">
        <div class="panel panel-primary">
            <div class="panel-heading">文件列表</div>
            <table class="table table-striped table-bordered" id="uploadTable">
                <thead>
                <tr>
                    <th>序号</th>
                    <th>文件名称</th>
                    <th>文件大小</th>
                    <th>上传状态</th>
                    <th>上传进度</th>
                    <th>操作</th>
                </tr>
                </thead>
                <tbody></tbody>
            </table>
            <div class="panel-footer">
                <div id="picker" class="btn btn-info">选择文件</div>
                <button id="btn" class="btn btn-default">开始上传</button>
                <button id="stop" class="btn btn-default">停止上传</button>
            </div>
        </div>
    </div>

    <div id="uploader-doc"></div>

</div>

<script src="https://static-page-1255518771.cos.ap-shanghai.myqcloud.com/common/js/jquery/jquery-3.4.1.min.js"></script>

<!-- 上传控件所需js -->
<script src="https://qcloud-1256166828.cos.ap-shanghai.myqcloud.com/script/javascript/uploader/web-uploader/0.1.6/web-uploader.min.js"></script>
<script src="https://qcloud-1256166828.cos.ap-shanghai.myqcloud.com/script/javascript/uploader/web-uploader/uploader.js"></script>
<script src="js/demo1.js"></script>

<script>

    $("#btn").on('click', function () {
        if (uploader.getFiles().length > 0) {
            $(".up-start").data('type', 'stop');
            $(".up-start").text('暂停');
            uploader.upload();
        }
        return false;
    });


    $("#stop").on('click', function () {
        if (uploader.getFiles().length > 0) {
            $(".up-start").data('type', 'start');
            $(".up-start").text('开始');
            uploader.stop(true);
        }
        return false;
    });

    $("#uploader-doc").load("https://qcloud-1256166828.cos.ap-shanghai.myqcloud.com/script/javascript/uploader/web-uploader/uploader-doc.html")

</script>
</body>
</html>