
阅读完需:约 8 分钟
一般情况下,我们在使用 Spring Security 的时候,用的是 Spring Security 自带的登录方案,配置一下登录接口,配置一下登录参数,再配置一下登录回调就能用了,这种用法可以算是最佳实践了!
总会有一些奇奇怪怪得需求,例如想自定义登录,像 Shiro 那样自己写登录逻辑,如果要实现这一点,该怎么做?
1. 前置储备
我们其实可以使用 HttpServletRequest 来完成系统的登录,这其实是 JavaEE 的规范,这种登录方式虽然冷门,但是却很好玩!
因为在 Spring Security 上的登录获取用户信息就是依靠传统的HttpServletRequest 里面的API来实现的。
可以写一个例子来实践一下:
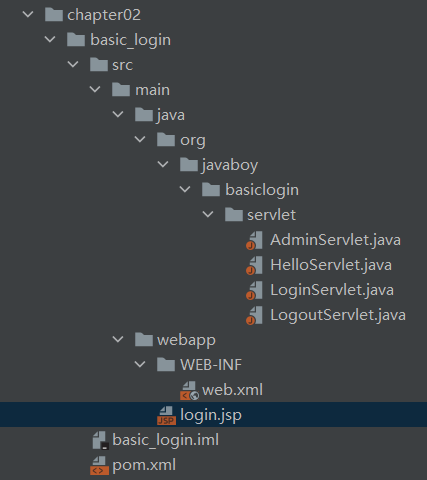
在这个例子里我们就只调用 servlet ,所以pom里也只有这个依赖。
LoginServlet:
用户登录
@WebServlet(urlPatterns = "/doLogin")
public class LoginServlet extends HttpServlet {
    @Override
    protected void doPost(HttpServletRequest req, HttpServletResponse resp) throws ServletException, IOException {
        String username = req.getParameter("username");
        String password = req.getParameter("password");
        try {
            req.login(username, password);
        } catch (ServletException e) {
            System.out.println("登录失败!");
            resp.sendRedirect("/login.jsp");
            return;
        }
        //登录成功
        //获取当前登录成功的用户对象
        Principal userPrincipal = req.getUserPrincipal();
        if (userPrincipal != null) {
            //登录成功
            //如果用户具备 admin 角色,就去 /admin/hello 接口,否则就去 /hello 接口
            if (req.isUserInRole("admin")) {
                resp.sendRedirect("/admin/hello");
            } else {
                resp.sendRedirect("/hello");
            }
        } else {
            //登录失败
            resp.sendRedirect("/login.jsp");
        }
    }
}
这个里的 req.login(username, password); 与 req.isUserInRole(“admin”) 一个是登录一个是判断角色都是 Security 中用的,这里是底层原始的API
LogoutServlet:
用户登出
@WebServlet(urlPatterns = "/logout")
public class LogoutServlet extends HttpServlet {
    @Override
    protected void doGet(HttpServletRequest req, HttpServletResponse resp) throws ServletException, IOException {
        req.logout();
        resp.sendRedirect("/login.jsp");
    }
}
HelloServlet:
普通用户登录
@WebServlet(urlPatterns = "/hello")
public class HelloServlet extends HttpServlet {
    @Override
    protected void doGet(HttpServletRequest req, HttpServletResponse resp) throws ServletException, IOException {
        Principal userPrincipal = req.getUserPrincipal();
        if (userPrincipal == null) {
            resp.setStatus(401);
            resp.getWriter().write("please login");
        } else {
            resp.getWriter().write("hello");
        }
    }
}
AdminServlet:
admin用户登录
@WebServlet(urlPatterns = "/admin/hello")
public class AdminServlet extends HttpServlet {
    @Override
    protected void doGet(HttpServletRequest req, HttpServletResponse resp) throws ServletException, IOException {
        Principal userPrincipal = req.getUserPrincipal();
        if (userPrincipal == null) {
            //说明没登录
            resp.setStatus(401);
            resp.getWriter().write("please login!");
        }else if(!req.isUserInRole("admin")){
            resp.setStatus(403);
            resp.getWriter().write("forbidden");
        }else {
            resp.getWriter().write("hello admin!");
        }
    }
}
login.jsp
<%@ page contentType="text/html;charset=UTF-8" language="java" %>
<html>
<head>
    <title>登录</title>
</head>
<body>
<form action="/doLogin" method="post">
    <input type="text" name="username">
    <input type="password" name="password">
    <input type="submit" value="登录">
</form>
</body>
</html>
这样一套简单的登录就完成了,虽然冷门但是确实底层,原始的登录,也是一套登录的集合API。
Spring Security 对 HttpServletRequest 登录逻辑的实现,或句话说,HttpServletRequest 中提供的那几个和登录相关的 API,Spring Security 都按照自己的实现方式对其进行了重写。
再创建一个项目,引入 Spring Security 依赖,它会替换重写原本的 HttpServletRequest API
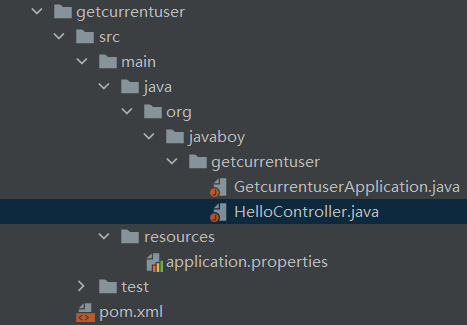
HelloController:
@RestController
public class HelloController {
    @GetMapping("/hello")
    public void hello(HttpServletRequest req) {
        System.out.println("req.getClass() = " + req.getClass());
        //获取当前登录用户名
        System.out.println("req.getRemoteUser() = " + req.getRemoteUser());
        //判断用户是否具备某一个角色
        System.out.println("req.isUserInRole(\"admin\") = " + req.isUserInRole("admin"));
        //获取当前登录成功的用户对象
        Authentication auth = (Authentication) req.getUserPrincipal();
        //获取当前登录的用户名
        System.out.println("auth.getName() = " + auth.getName());
        //获取当前登录的用户角色
        System.out.println("auth.getAuthorities() = " + auth.getAuthorities());
    }

    @GetMapping("/hello2")
    public void hello2(Authentication authentication) {
        System.out.println("authentication = " + authentication);
    }

    @GetMapping("/hello3")
    public void hello3(Principal principal) {
        System.out.println("principal = " + principal);
    }
}
在这个 HttpServletRequest 里能获取到所有想要的用户信息。
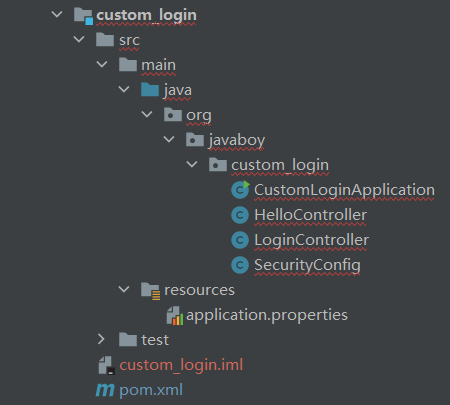
2.DIY登录
创建一个新的项目来测试DIY登录
方便起见,我们在 application.properties 中配置一下默认的用户名密码:
spring.security.user.name=javaboy
spring.security.user.password=123
接下来我们提供一个 SecurityConfig,为登录接口放行:
SecurityConfig:
@Configuration
public class SecurityConfig extends WebSecurityConfigurerAdapter {
    @Override
    protected void configure(HttpSecurity http) throws Exception {
        http.authorizeRequests()
                .antMatchers("/login","/login2").permitAll()
                .anyRequest().authenticated()
                .and()
                .csrf().disable();
    }
}
登录接口就是 /login,一会我们自定义的登录逻辑就写在这个里边,我们来看下:
LoginController:
@RestController
public class LoginController {
    @PostMapping("/login")
    public String login(String username, String password, HttpServletRequest req) {
        try {
            //去登录
            req.login(username, password);
            return "success";
        } catch (ServletException e) {
            e.printStackTrace();
        }
        return "fail";
    }
}
直接调用 HttpServletRequest#login 方法,传入用户名和密码完成登录操作。
最后我们再提供一个测试接口,如下:
@RestController
public class HelloController {
    @GetMapping("/hello")
    public String hello() {
        return "hello security!";
    }
}
just this!
启动项目,我们首先访问 /hello 接口,会访问失败,接下来我们访问 /login 接口执行登录操作,如下:

登录成功之后,再去访问 /hello 接口,此时就可以访问成功了。
原理分析
我们在 LoginController#login 方法中所获取到的 HttpServletRequest 实例其实是 HttpServlet3RequestFactory 中的一个内部类 Servlet3SecurityContextHolderAwareRequestWrapper 的对象,在这个类中,重写了 HttpServletRequest 的 login 以及 authenticate 等方法,我们先来看看 login 方法,如下:
@Override
public void login(String username, String password) throws ServletException {
	if (isAuthenticated()) {
		throw new ServletException("Cannot perform login for '" + username + "' already authenticated as '"
				+ getRemoteUser() + "'");
	}
	AuthenticationManager authManager = HttpServlet3RequestFactory.this.authenticationManager;
	if (authManager == null) {
		HttpServlet3RequestFactory.this.logger.debug(
				"authenticationManager is null, so allowing original HttpServletRequest to handle login");
		super.login(username, password);
		return;
	}
	Authentication authentication = getAuthentication(authManager, username, password);
	SecurityContextHolder.getContext().setAuthentication(authentication);
}
可以看到:
- 如果用户已经认证了,就抛出异常。
- 获取到一个 AuthenticationManager 对象。
- 调用 getAuthentication 方法完成登录,在该方法中,会根据用户名密码构建 UsernamePasswordAuthenticationToken 对象,然后调用 Authentication#authenticate 方法完成登录,具体代码如下:
private Authentication getAuthentication(AuthenticationManager authManager, String username, String password)
		throws ServletException {
	try {
		return authManager.authenticate(new UsernamePasswordAuthenticationToken(username, password));
	}
	catch (AuthenticationException ex) {
		SecurityContextHolder.clearContext();
		throw new ServletException(ex.getMessage(), ex);
	}
}
该方法返回的是一个认证后的 Authentication 对象。
最后,将认证后的 Authentication 对象存入 SecurityContextHolder 中
这就是 login 方法的执行逻辑。
Servlet3SecurityContextHolderAwareRequestWrapper 类也重写了 HttpServletRequest#authenticate 方法,这个也是做认证的方法:
@Override
public boolean authenticate(HttpServletResponse response) throws IOException, ServletException {
	AuthenticationEntryPoint entryPoint = HttpServlet3RequestFactory.this.authenticationEntryPoint;
	if (entryPoint == null) {
		HttpServlet3RequestFactory.this.logger.debug(
				"authenticationEntryPoint is null, so allowing original HttpServletRequest to handle authenticate");
		return super.authenticate(response);
	}
	if (isAuthenticated()) {
		return true;
	}
	entryPoint.commence(this, response,
			new AuthenticationCredentialsNotFoundException("User is not Authenticated"));
	return false;
}
可以看到,这个方法用来判断用户是否已经完成认证操作,返回 true 表示用户已经完成认证,返回 false 表示用户尚未完成认证工作。
看了上面的原理分析,大家应该也明白了第二种方案了,就是不使用 HttpServletRequest#login 方法,我们直接调用 AuthenticationManager 进行登录验证。
一起来看下。
首先我们修改配置类如下:
SecurityConfig:
@Configuration
public class SecurityConfig extends WebSecurityConfigurerAdapter {
    @Override
    protected void configure(HttpSecurity http) throws Exception {
        http.authorizeRequests()
                .antMatchers("/login","/login2")
                .permitAll()
                .anyRequest().authenticated()
                .and()
                .csrf().disable();
    }

    @Override
    @Bean
    public AuthenticationManager authenticationManagerBean() throws Exception {
        DaoAuthenticationProvider provider = new DaoAuthenticationProvider();
        InMemoryUserDetailsManager manager = new InMemoryUserDetailsManager();
        manager.createUser(User.withUsername("javaboy").password("{noop}123").roles("admin").build());
        provider.setUserDetailsService(manager);
        return new ProviderManager(provider);
    }
}- 首先在登录放行中,添加
/login2接口,这是我即将自定义的第二个登录接口。 - 提供一个 AuthenticationManager 实例,创建 AuthenticationManager 实例时,还需要提供一个 DaoAuthenticationProvider,大家知道,用户密码的校验工作在这个类里边完成,并为 DaoAuthenticationProvider 配置一个 UserDetailsService 实例,该实体提供了用户数据源。
关于 DaoAuthenticationProvider 类的玩法与说明:
接下来提供一个登录接口:
@RestController
public class LoginController {
    @Autowired
    AuthenticationManager authenticationManager;
    @PostMapping("/login2")
    public String login2(String username, String password, HttpServletRequest req) {
        try {
            Authentication token = authenticationManager.authenticate(new UsernamePasswordAuthenticationToken(username, password));
            SecurityContextHolder.getContext().setAuthentication(token);
            return "success";
        } catch (Exception e) {
            e.printStackTrace();
        }
        return "failed";
    }
}在登录接口中,传入用户名密码等参数,然后将用户名密码等参数封装成一个 UsernamePasswordAuthenticationToken 对象,最后调用 AuthenticationManager#authenticate 方法进行验证,验证成功后会返回一个认证后的 Authentication 对象,再手动把该 Authentication 对象存入 SecurityContextHolder 中。
配置完成后,重启项目,进行登录测试即可。
第二种方案和第一种方案异曲同工,第二种实际上就是把第一种的底层拉出来自己重新实现,仅此而已。
